Free Lesson Plan: Teaching Replication, Transcription, and Translation
DNA replication, transcription, and translation basics are an important part of any introductory biology course. Here’s a lesson plan instructors can use or modify to teach their students these key concepts. It’s packed with review questions to make sure your students understand what they’ve learned about each topic before moving on to new ideas.
This lesson plan encompasses many concepts and would be best spread over the course of several days. By the end, students will be able to:
- Describe the processes of replication, transcription, and translation
- Describe the three steps in transcription
- Define the following terms
- mRNA
- tRNA
- Amino acids
- DNA polymerase
- Primase
- Codon
- Anticodon
Part of this lesson plan will include content from Visible Biology, an immersive, 3D guide to biological concepts and processes. Why Visible Biology? Visible Biology’s 3D visualizations go beyond 2D illustrations to show spatial relationships, which reinforce key takeaways and encourage students to draw comparisons between ideas. Biology students who interact with 3D models are more motivated to learn, and learning in 3D can help students retain information.
Let’s go!
Before the Lesson
Before learning about the processes of replication, transcription, and translation, students should already have a solid foundation in regards to DNA structure, including base pairs.
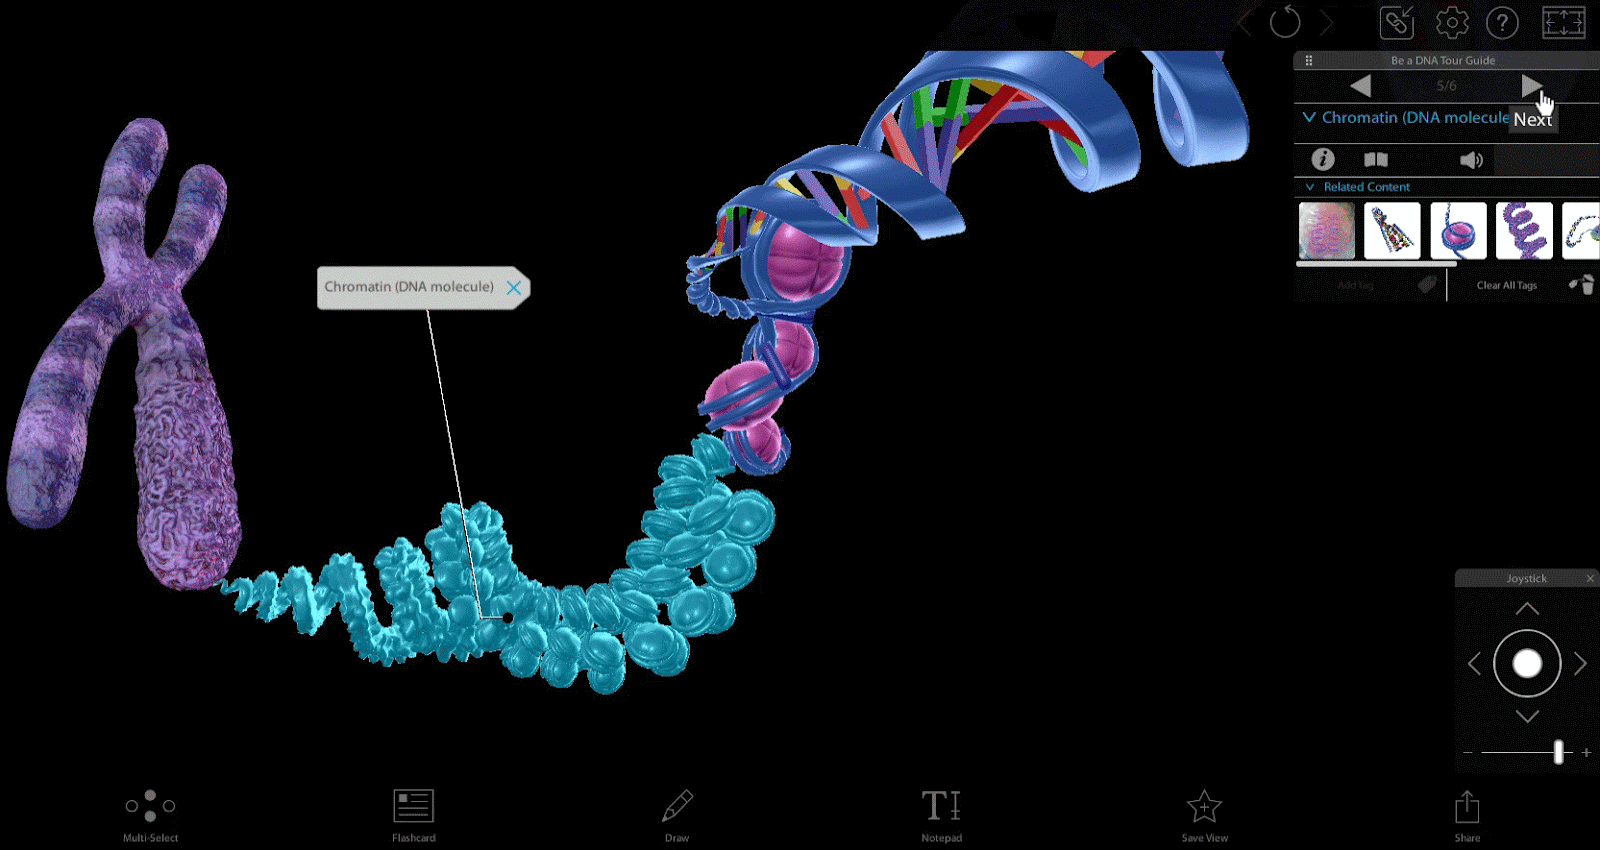
Check out “Four Ways to Teach DNA Structure with Visible Biology” to get ideas and inspiration on how to teach DNA structure. The article will show you how to guide students through the structure of DNA, design scavenger hunts, make a Flashcard game show, and reinforce lessons with bite-sized video content. It also includes a link to a series of pre-made assignments in Courseware you can copy and modify for your classroom!
Replication
Before talking about replication, transcription, and translation, make sure your students remember these key concepts.
- What are the nitrogenous bases and how do they pair up with each other?
- What’s the significance of the order of base pairs?
Explain that cells are dividing all the time throughout the body, and that when a parent cell divides, both daughter cells need DNA material. That’s what replication is for: making a copy of DNA so that each new cell has a full set of chromosomes. Because base pairs, well, come in pairs, when you split them apart, you can tell what the other side should be.
Helicase is an enzyme that “unzips” the strand of DNA, creating what’s called the “replication fork,” like a fork in the road. You can use the draw tool on Visible Biology’s 3D model to illustrate the replication fork in action!
Primase, another enzyme, creates a short RNA sequence called a primer that makes a starting point for DNA synthesis. DNA polymerase 3 binds to that primer and makes a complementary strand of DNA on each of the old strands, completing two new matching “ladders.”
Explain the leading strand (3’ to 5’) and the lagging strand (5’ to 3’) and the direction in which the process goes. While the leading strand’s DNA is copied continuously, the lagging strand lags because it needs a new primer for each Okazaki fragment. Ligase connects the Okazaki fragments to the DNA generated by the lagging strand.
After the lecture, check back in with your students to make sure they understand what they’ve learned so far. Here are some questions to ask the class:
- How is the replication fork created?
- What does primase do?
- What does DNA polymerase do?
Transcription
To explain the steps of transcription and translation, let’s turn it over to Dr. Cindy Harley of Metropolitan State University. In the Visible Biology YouTube series, Dr. Harley breaks down tough biological concepts in short, easy-to-understand videos. Each video is short enough to be shown during class, or they can be assigned as homework. They can also be used as teaching inspiration; ask yourself which ideas and examples you want to incorporate into your classroom!
After introducing the material, do a quick review using Flashcards. Flashcards are a great way to quickly quiz your students and match concepts to visuals. Making flashcards is simple: select the model you would like to use (like the Molecular Level of DNA model) and click the “Flashcard” button on the lower toolbar. Then you can reposition the model and edit both sides of the Flashcard. You can add labels and text, and you can use the draw tool to create drawings, arrows, circles, boxes, and other annotations. Click “Save Flashcard,” give the Flashcard a name and difficulty rating, and you are ready to go! Access your Flashcards and assemble Decks by going to the Visible Biology menu and clicking Study on the upper toolbar.
Time to review! Check in with your students using the following review questions:
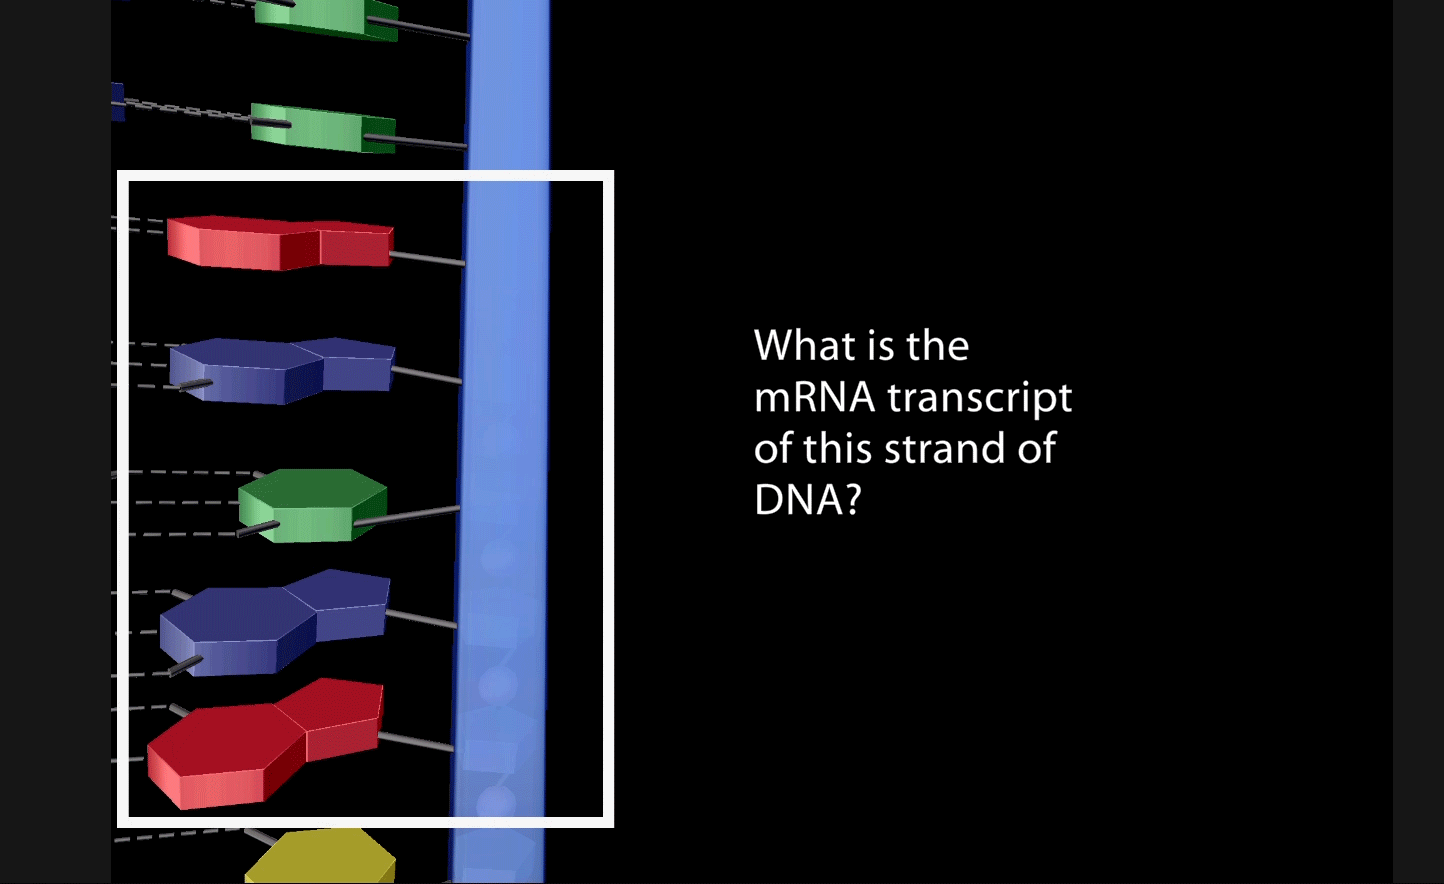
- What are the three steps in transcription?
- What’s the difference between the coding strand and the template strand?
- What is the initiation codon?
- What nitrogenous base stands in for thymine in RNA?
Translation
Now students will learn how the mRNA transcript is used as a recipe to create proteins!
Ask students to take notes as they watch the video. By the end, students will understand that:
- Through translation, the mRNA transcript directs the creation of proteins.
- Codons are groups of three nitrogenous bases.
- Of the 64 codons, 61 encode amino acids. The remaining 3 are called stop codons.
- mRNA binds to a ribosome, which binds with tRNA.
- There are 20 amino acids (some codons are redundant).
- The end of tRNA that binds with the codon is called the anticodon. The other end of the tRNA contains an amino acid that corresponds with the codon.
- When the next tRNA binds with the codon, its amino acid connects with the previous one, creating a chain of amino acids. This continues until it reaches a stop codon.
Next, students will illustrate their knowledge—literally! Ask students to draw the process of translation in four panels, like a comic strip. Encourage them to use colors and labels to customize their drawings and make them as clear as possible to study from later.
Panel 1: Show the strand of mRNA binding to a ribosome.
Panel 2: Show the tRNA molecule (with an anticodon on one side and an amino acid on the other) matching with the corresponding mRNA. The anticodon binds to the codon.
Panel 3: Show another tRNA molecule and ribosome binding to the next codon. Show how the amino acids connect, forming a chain.
Panel 4: Show the stop codon and the completion of the amino acid sequence.
Click here to download a free worksheet for this activity that supplies the panels and prompts!
After the activity is completed, ask your students the following:
- How many nitrogenous bases make up a codon?
- What do the codons that don’t code for amino acids do?
- How do anticodons help form amino acids?
Learn More
With Visible Biology’s 3D models, you can teach your students about DNA replication, transcription, and translation with 3D models that allow them to explore spatial relationships. With tools like Flashcards, Tours, and 3D quizzes, instructors can lecture and review in an interactive way. Get a free instructor trial through our Education Team!
Check out some of our other resources for the biology classroom:
- Visible Biology lab activities
- Free Lesson Plan: Diffusion and Osmosis with Visible Biology
- Teaching Photosynthesis with Visible Biology: A Free Lesson Plan
Check out our new, dissectible invertebrate models!
Be sure to subscribe to the Visible Body Blog for more awesomeness!
Are you an instructor? We have award-winning 3D products and resources for your anatomy and physiology or biology course! Learn more here.

