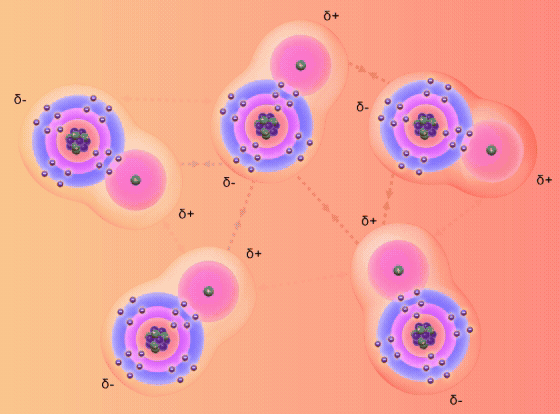
Why can some molecules cross the plasma membrane easily while others require specialized channels or the use of energy? What gives water its ...
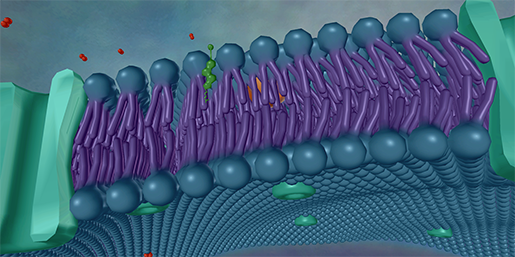
A key component of introductory biology courses is understanding the structure of the plasma membrane and how different substances move across it. ...
Visible Body’s 3D visual learning tools make it easy to compare healthy anatomy with disease states, providing an integrated picture of anatomy, ...
The lymphatic system doesn’t get nearly as much hype as it deserves, but Visible Body is here to fix that. In the newest release of Visible Body ...
Visible Body is best known for its comprehensive library of 3D life sciences models, but its study tools also help students nail vocabulary and think ...
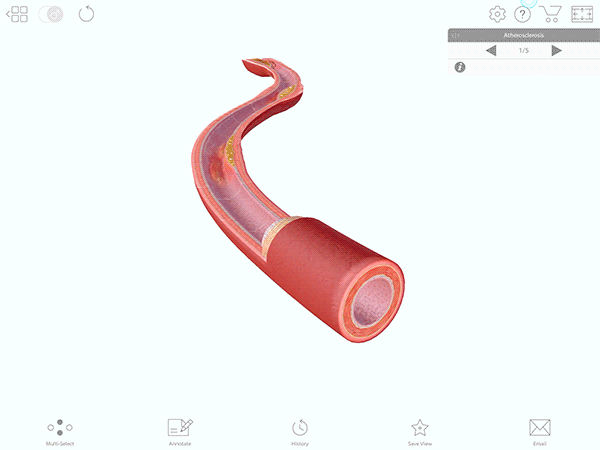
As the world’s second leading cause of mortality, strokes are an important topic in allied health education. Visible Body’s vast library of content ...
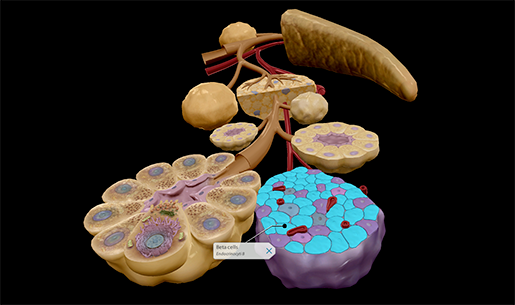
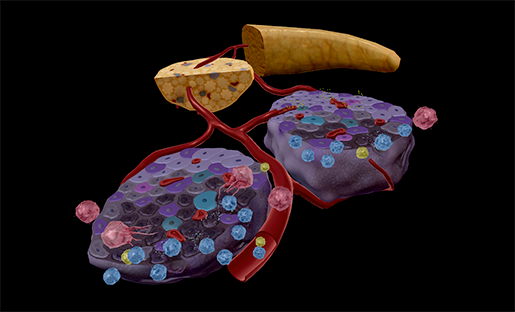
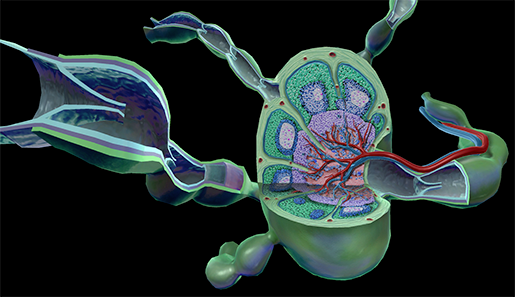
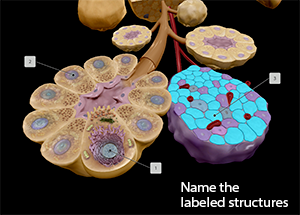
Visible Body’s 3D renal anatomy models help students visualize kidney anatomy, physiology, and pathologies. In this blog post, we’ll look at the ...
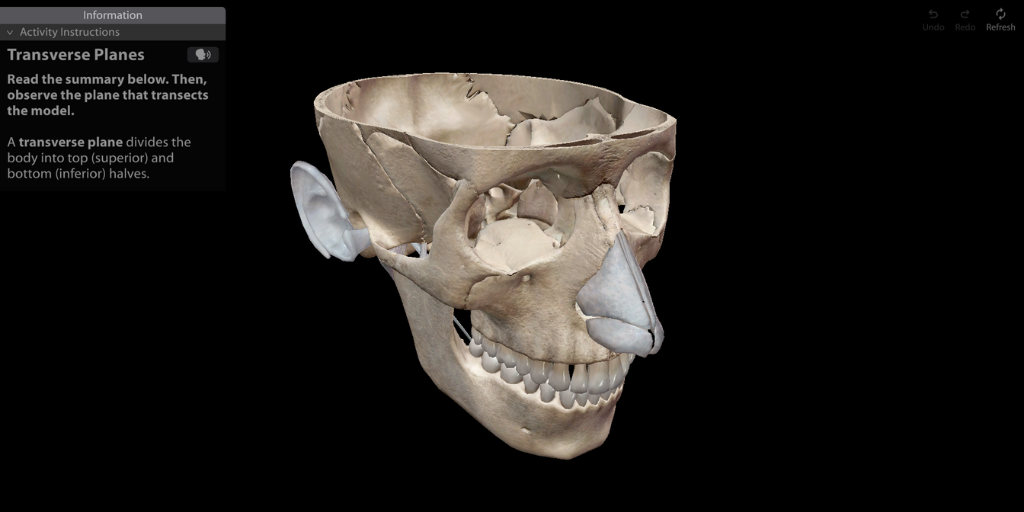
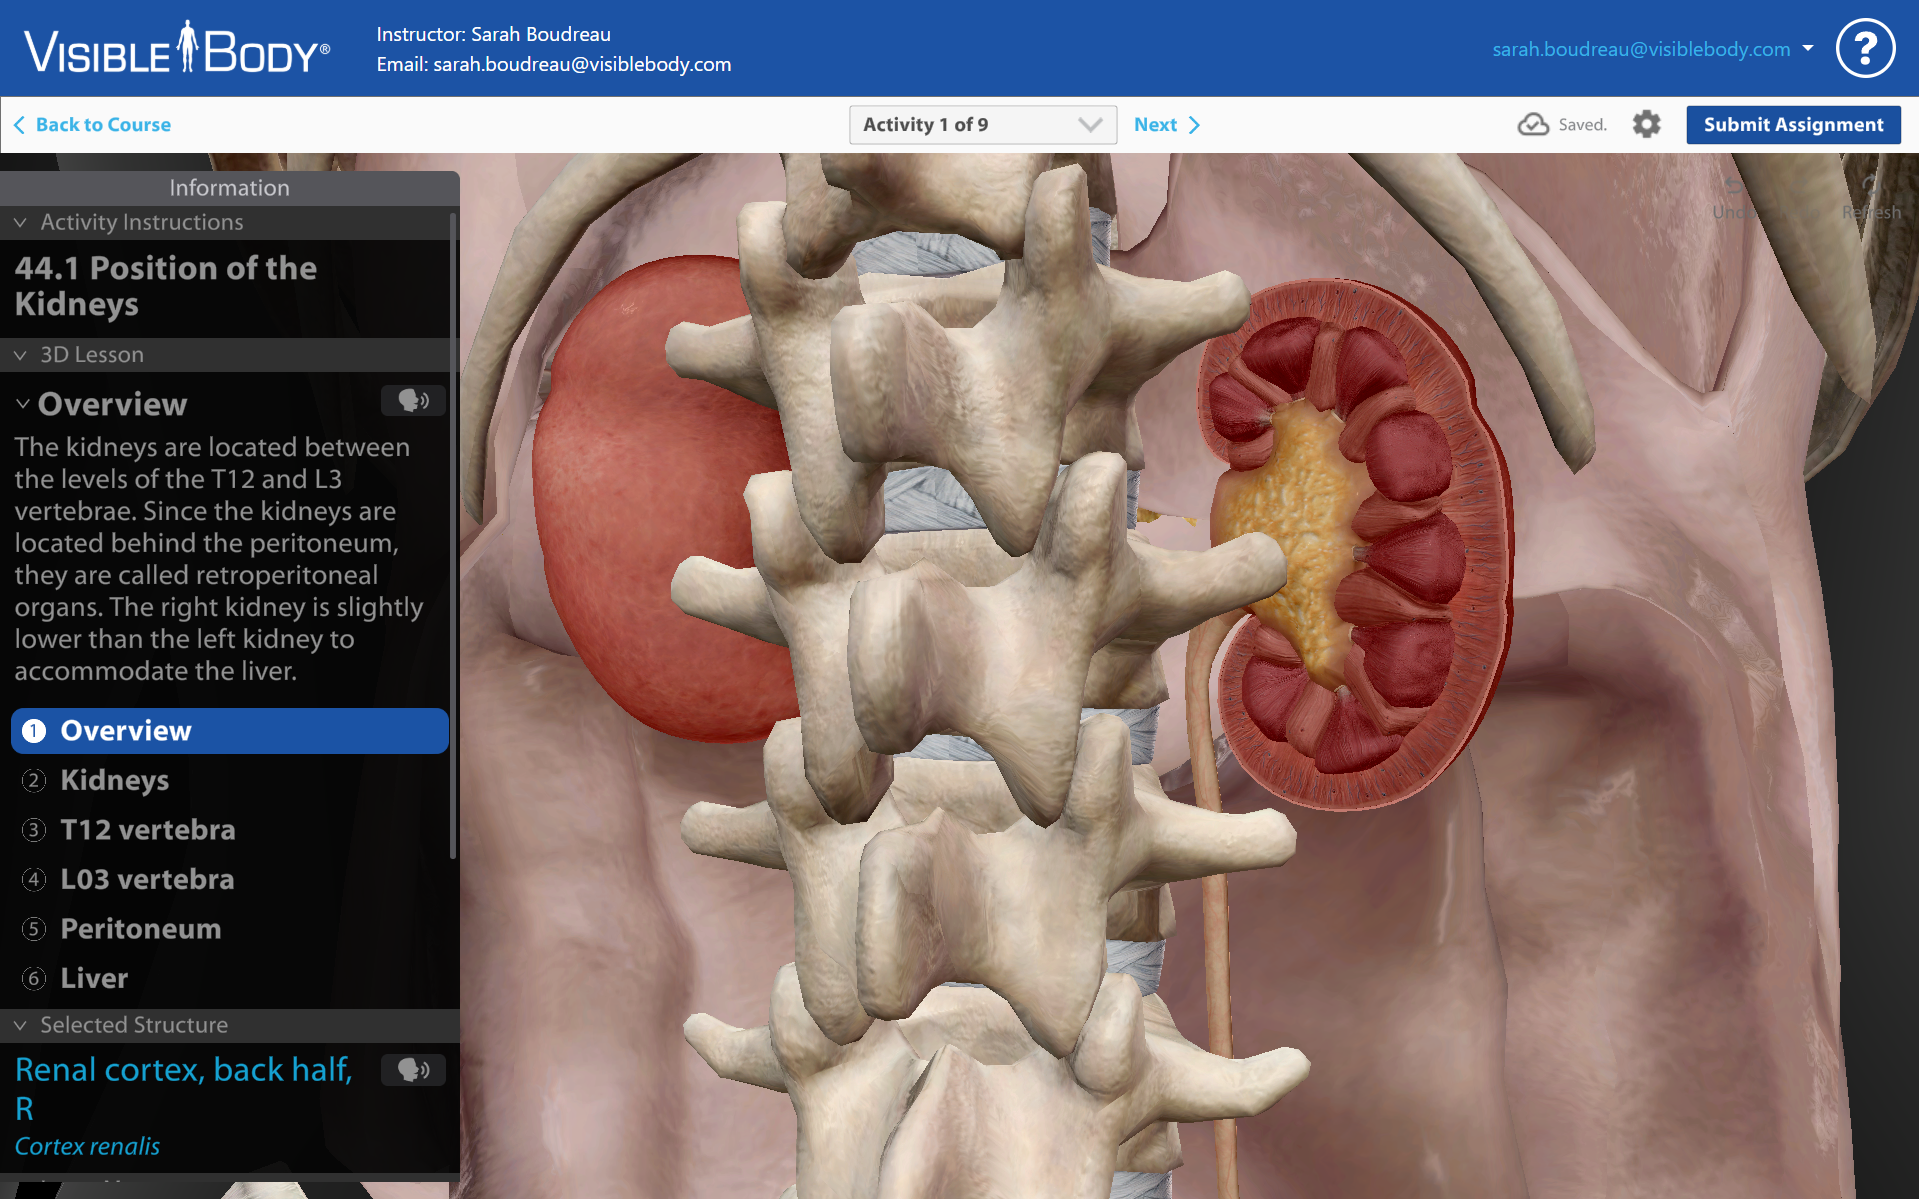
VB Courseware, Visible Body's teaching and learning platform that’s loaded with 3D visual science content, makes it simple to set up a new course. ...
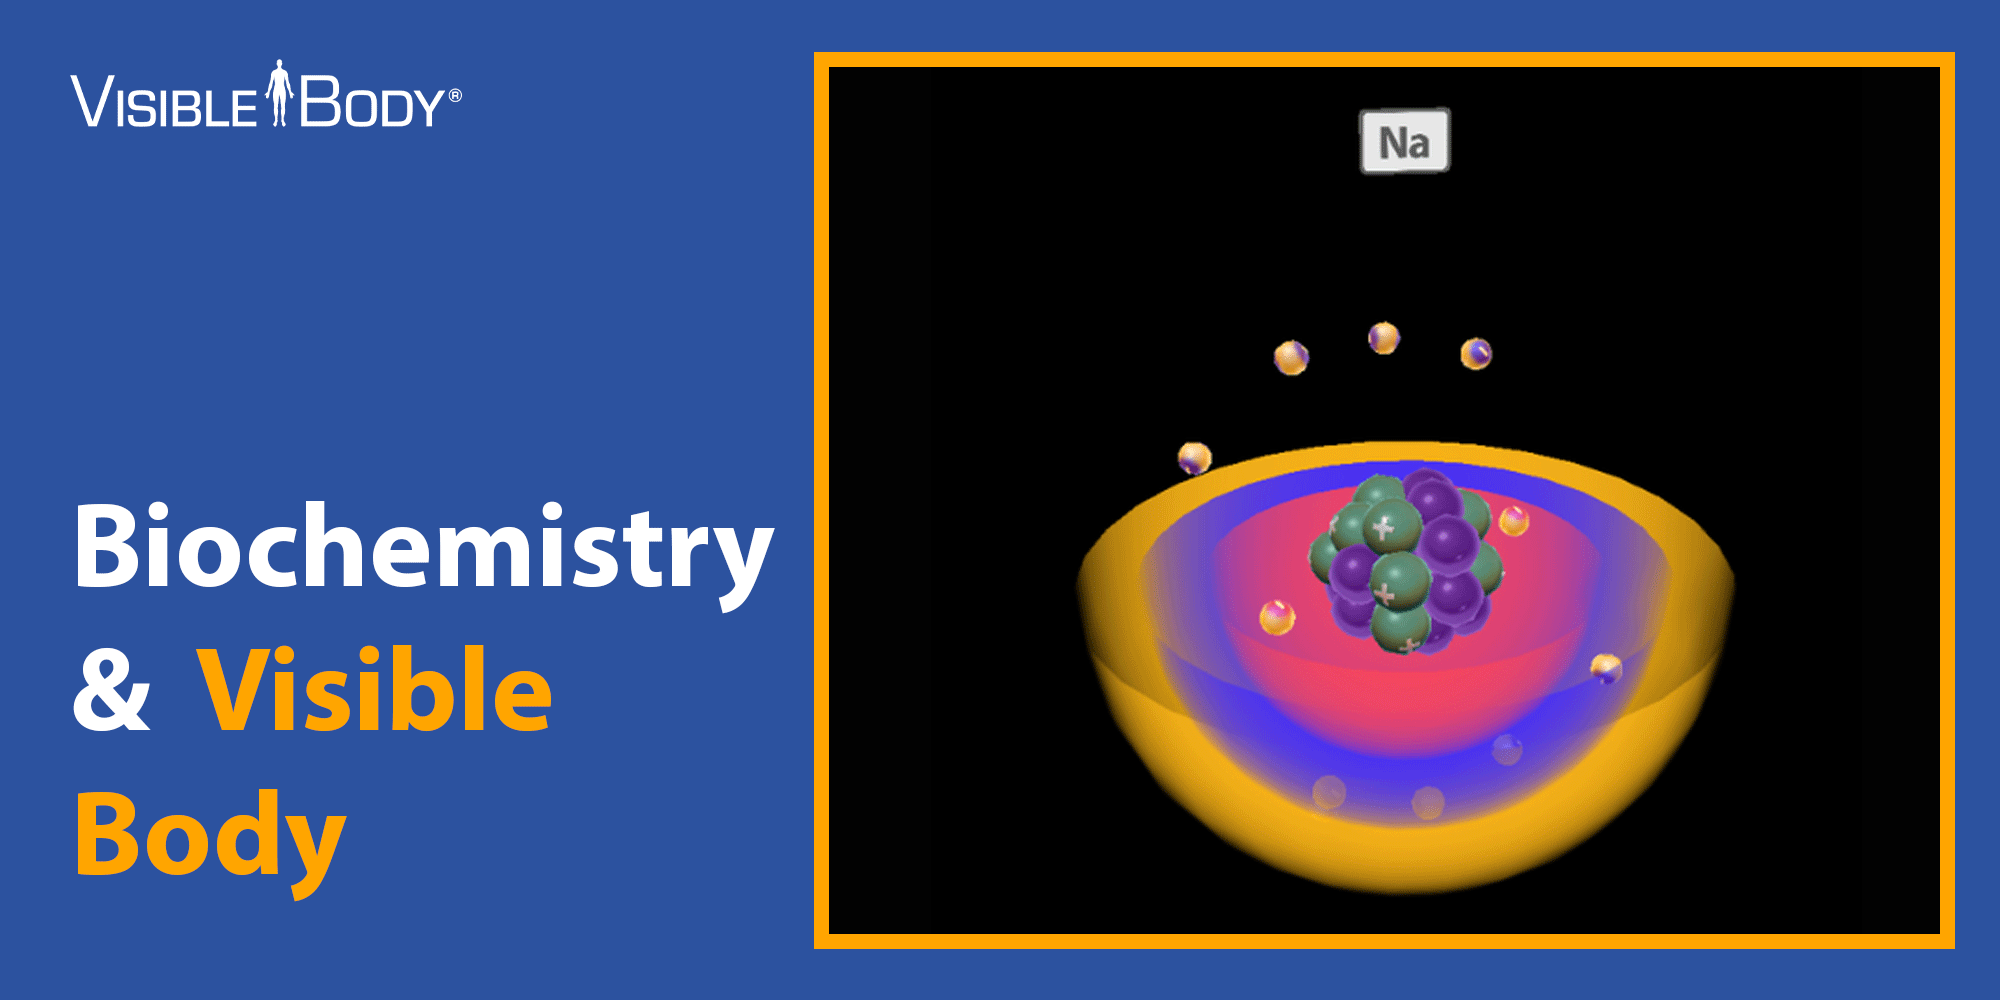
Visible Body recently released new atom and bonding models in Visible Body Suite and Courseware—our first foray into biochemistry! Thanks to these ...