4 Mitosis and Meiosis Activities: Teaching Biology with Visible Body Suite
One major challenge in the bio classroom is that processes at the cellular level can be difficult for students to visualize. Visible Body Suite solves that problem with interactive 3D models that illustrate complex processes! This blog post will walk you through four activities that use VB Suite to teach mitosis and meiosis!
The activities we’ll discuss today assume that your students have a base knowledge of mitosis and meiosis.
When it comes to making lectures memorable, VB Suite’s got you covered. Not only are the annotatable 3D models and simulations great visual aids, but VB Suite’s Tours feature makes lectures more dynamic and interactive, and its bite-size animation videos deliver information quickly and efficiently. After students have the basics down, these activities will reinforce information.
1. Student tour guides
We just talked about how VB Suite’s features make it a great lecturing aid—in this activity, we’re flipping the script and asking students to be the teachers.
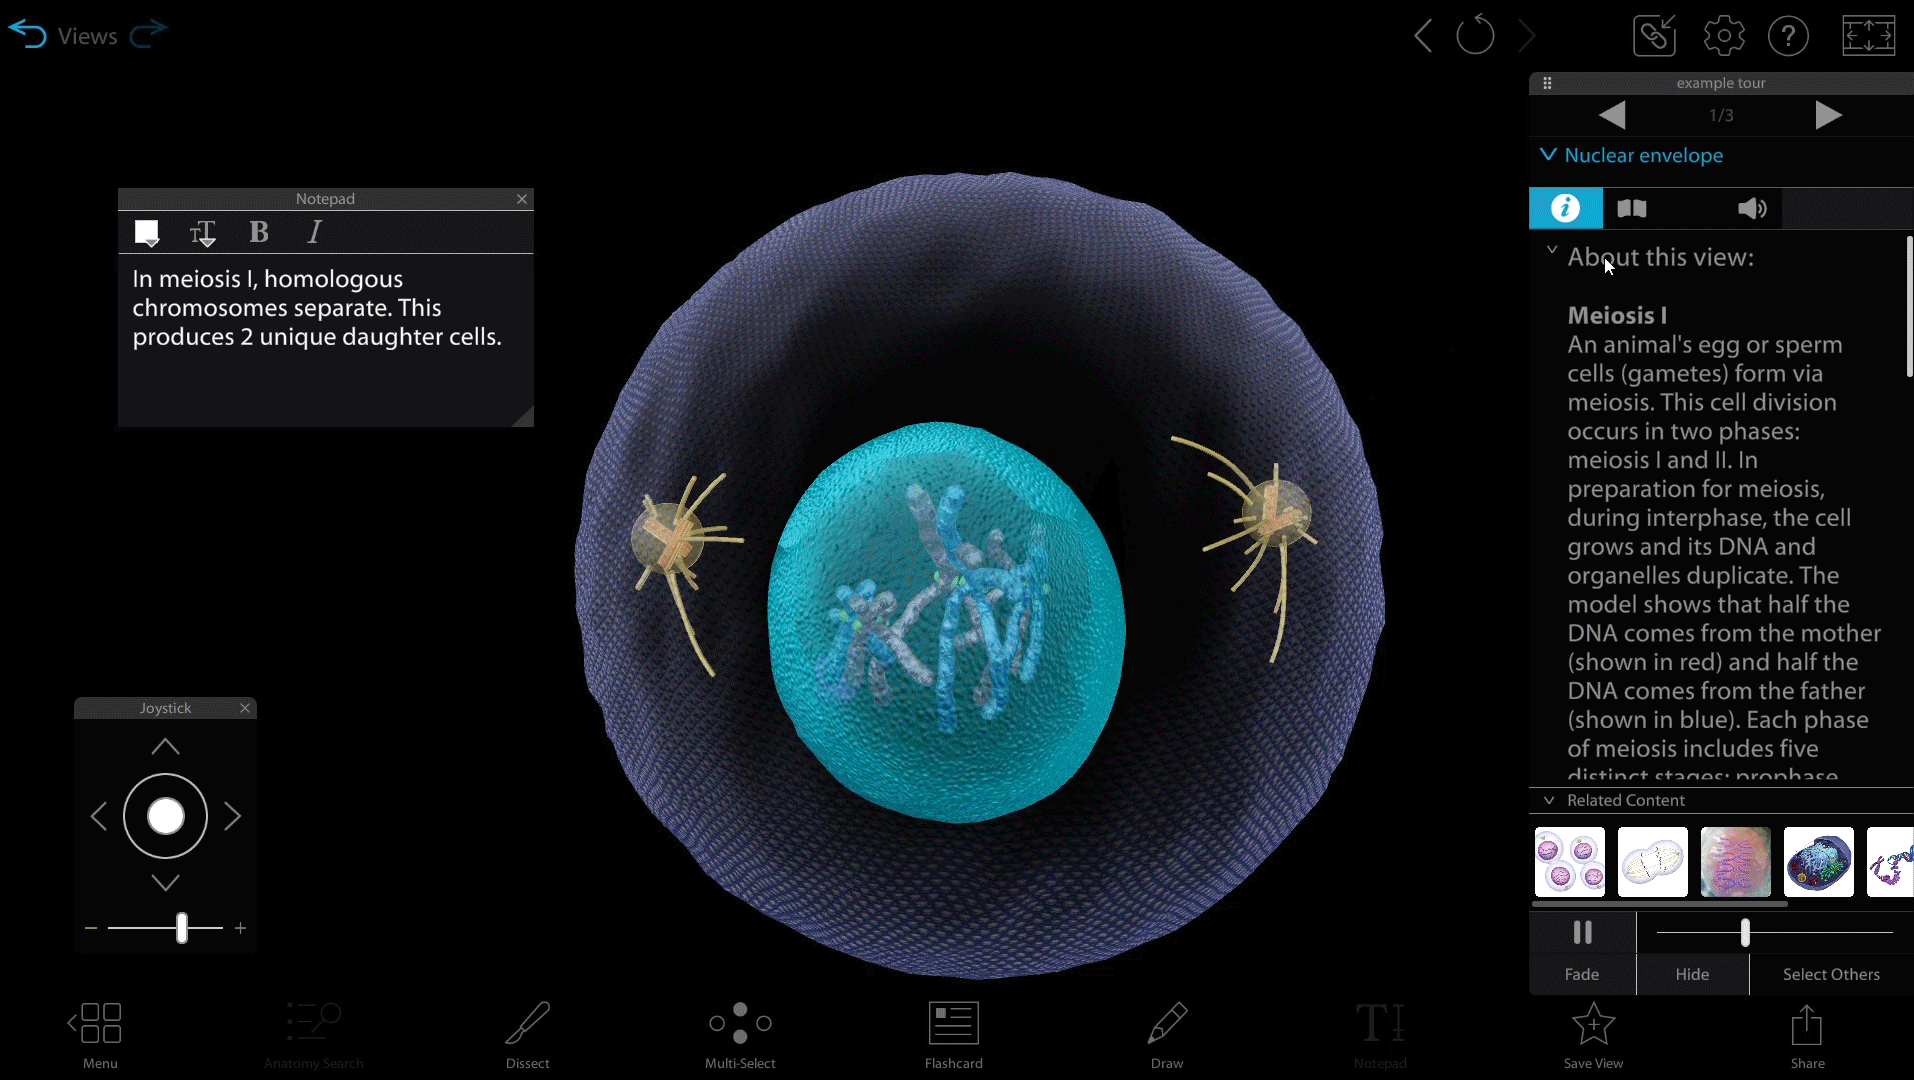
Tours are a linked series of custom Views. GIF from VB Suite.
Using Tours, students will work independently or in pairs to make a custom presentation that they will then use to “teach” their peers.
Assign half of the class to present on mitosis and assign meiosis to the other half. When creating their lectures, ask students to do the following:
- Explain which cells undergo this process
- Explain each phase
- Use at least 4 different views in the Tour
- Use the draw tool to draw arrows and other annotations to make structures clear
When their Tours are complete, have mitosis students present to meiosis students and vice versa.
When both teaching sessions are over, have students work together to come up with a list of differences between the two processes. Classes who require more guidance can use this set of questions to get started on reflection:
- What kind of cells undergo meiosis and what kind undergo mitosis?
- By the end of mitosis and the end of meiosis, how many cells are there? How genetically similar are they?
- What are the phases of mitosis and meiosis?
Tours can be shared with a few clicks, so it’s easy for students to turn in their work.
2. Flashcard challenge
In this activity, students make their own Flashcard Decks with prompts designed to stump their peers. Through this, you will ask students to think about the challenging aspects of learning mitosis and meiosis.
To create a Flashcard, users adjust the model until it’s just right, then add labels, text, and drawings to the front and back of the Flashcard. Flashcards can then be added to a Deck.
Flashcard in VB Suite.
By designing their own Flashcards, students will think critically about the steps of meiosis and mitosis and the differences between the two processes.
Flashcard Decks are also shareable, so students can turn in their links at the end of the day. You can then pick out the best Flashcards and put together a Flashcard Deck of highlights to quiz the class with the next day as a warmup!
3. Concept maps
This activity is inspired by traditional classroom “cut and paste” activities and the sketch notes that Dr. Cindy Harley uses with her anatomy and physiology students. In this activity, students make a visual map of the stages of mitosis and meiosis, respectively.
Students will use VB Suite models as a foundation for their own visual representations of mitosis and meiosis. Instead of sketching out the processes of mitosis and meiosis, ask students to position and pause the models and click “Download image” to save an image file to their computer.
Students can either print out their images and use glue, paper, and markers to create their own concept maps, or they can use the draw tool in VB Suite alongside an online tool like Canva to create a digital map. The process of creating the map will reinforce what students have learned, and by the end, they will also have a study tool!
4. Hands-on group work
In this activity, students will work in groups, using VB Suite’s interactive animations as a guide to order and describe the phases of mitosis and meiosis.
This activity will require a little bit of preparation before class starts. You will need:
- Paper
- Sticky tack or tape
- Pencil or dry erase marker
- Optional: lamination supplies
Position and pause the animated 3D models and, using the image download feature, print off images of the various stages of mitosis and meiosis, one image per piece of paper. Leave enough room on the paper for students to write the name of the phase and what happens during the phase. If you can, laminate these so students can write on them with dry erase markers and you can reuse them class after class!
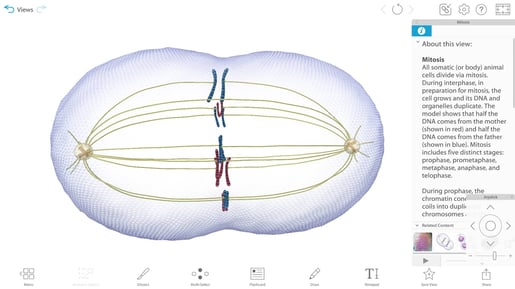
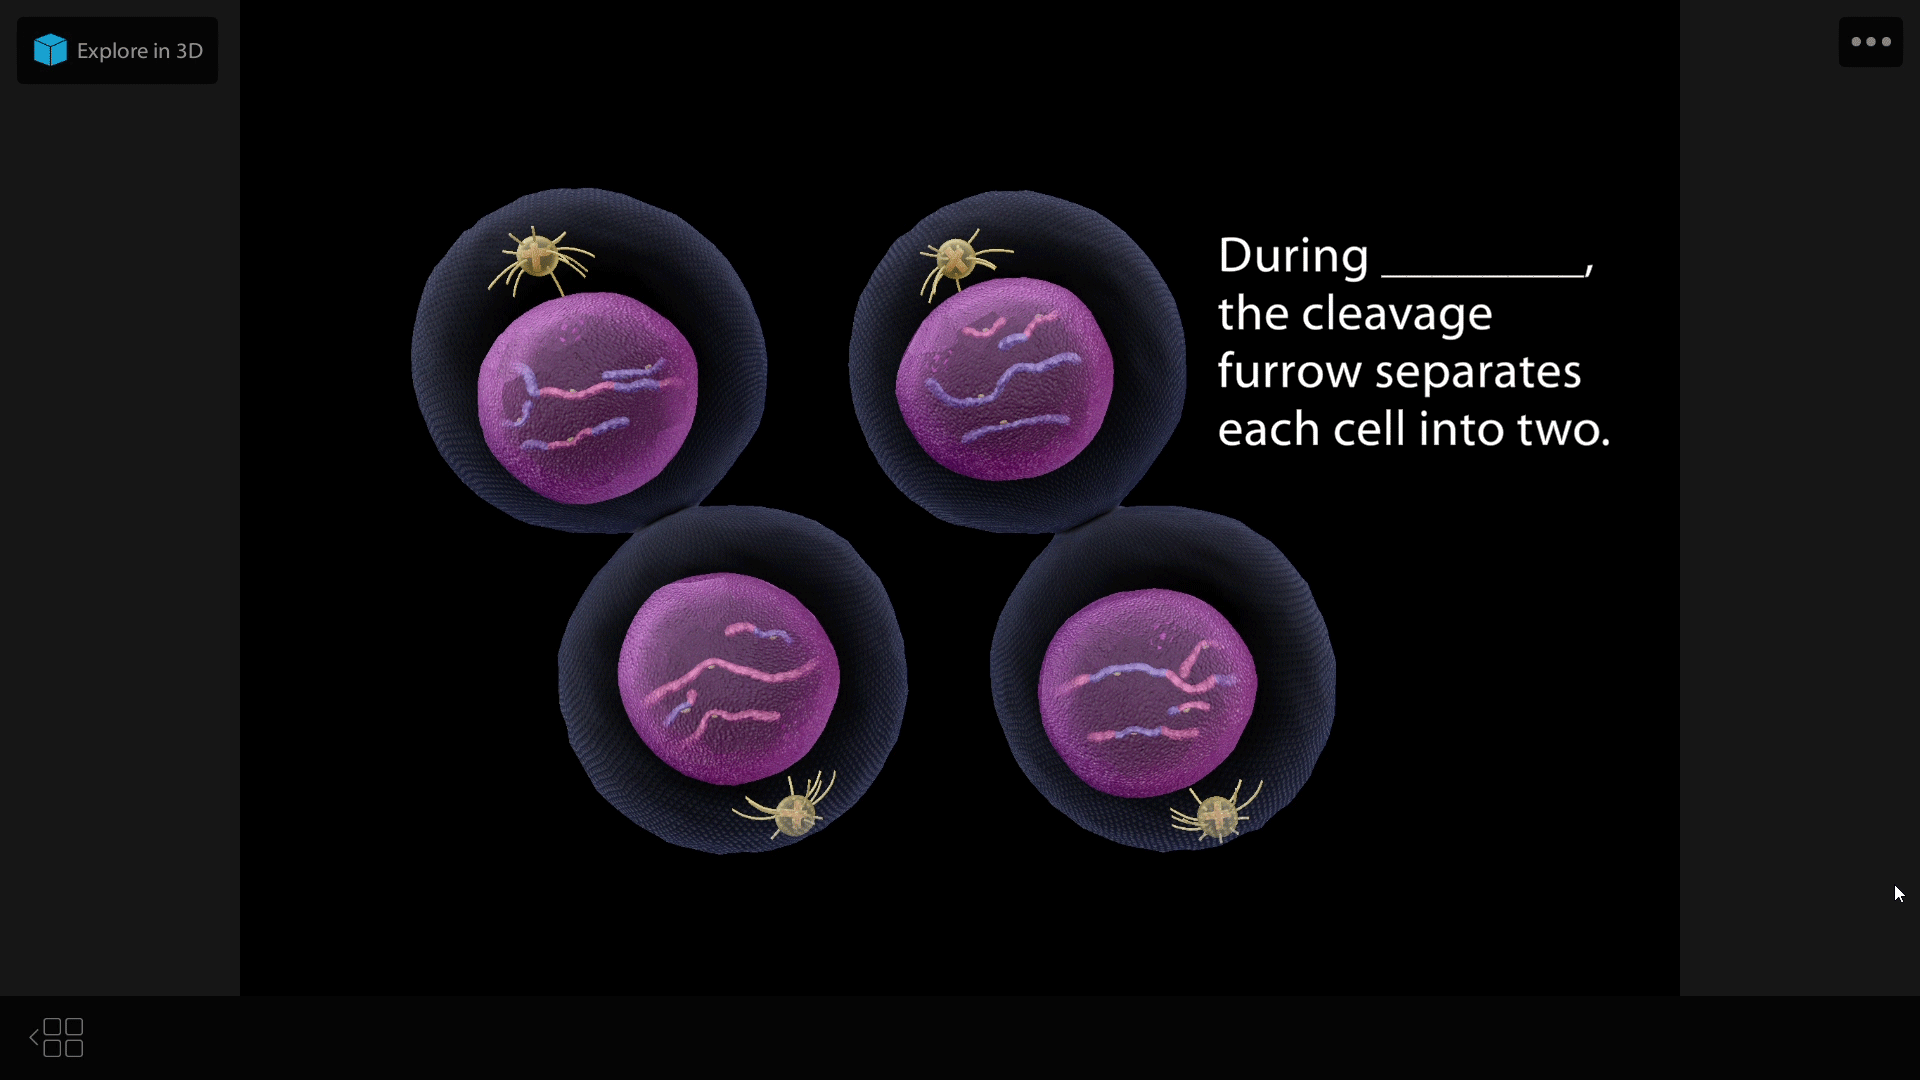
Image from VB Suite.
Divide your class into groups of three or four and give each group a set of images. Students will then use their textbooks and VB Suite interactive animations to determine which image corresponds with which step.
Students will:
- Determine which phases occur in mitosis and which phases occur in meiosis
- Write the name of the phase
- Write a bulleted list of what happens during that phase
- Organize the phases in order by using sticky tack or tape to put them up on the classroom wall
As students work on this activity, you can walk around the room, answering questions and giving pointers when students get stuck!
Read more
Visible Body is committed to enhancing classrooms and helping instructors make the most out of their courses! Read more on the blog:
- Teaching High School Bio with Visible Body Suite: An Interview with Kristin Cowell of Nashoba Regional High School
- Free Lesson Plan: Teaching Replication, Transcription, and Translation
- Four Ways to Teach DNA Structure with Visible Biology
- Free Lesson Plan: Diffusion and Osmosis with Visible Biology
- Teaching Photosynthesis with Visible Biology: A Free Lesson Plan
Interested in using VB Suite in your classroom? Request an instructor trial today!
Be sure to subscribe to the Visible Body Blog for more anatomy awesomeness!
Are you an instructor? We have award-winning 3D products and resources for your anatomy and physiology course! Learn more here.

