Free AR Lesson Plan: The Anatomy and Physiology of the Eye
Looking for more ways to use Visible Body’s apps in your classroom? Today, we’re going to walk through a lesson plan composed of five short activities that will use Visible Body Suite, Anatomy & Physiology, and basic household items to help your students learn about the eye in a visually-engaging and interactive way!
Activity 1: Learn the Structures of the Eye
The first activity in this series will let students learn the main structures of the eye by exploring the 3D microanatomy model of the eye in Visible Body Suite.
Click here to download a copy of the worksheet for this activity (it’s the first two pages of this set).
Students can access the 3D eye model by opening up VB Suite on their device, going to Quizzes > Lab Activities > Eye and Ear Lab, and selecting 1. Eye. If their device is AR compatible, they can hit the AR button at the bottom of the screen. Then, if they focus their device’s camera on the image of the eye on the AR lab worksheet and tap the blue arrow, the model will appear in AR.
Once students have the eye model open on their device, either in AR or just in VB Suite, they should locate and read the info box descriptions for the following structures:
- Choroid
- Ciliary bodies
- Cone cells
- Cornea
- Iris
- Retina
- Rod cells
- Sclera
Then, using the table on the worksheet, students should organize those structures according to the layer of the eye in which they can be found—fibrous, vascular or inner.
For the purposes of the next activity (creating a model eye), they should take a quick look at the pupil as well, though they won’t need it for the worksheet in this activity.
Activity 2: Create a Model Eye
To get an idea of how the eye takes in light and to observe the roles of the retina, choroid, and pupil, students will build their very own model eyes! This activity is part of a full A&P lab manual on vision and the eye. You can access it, as well as the rest of our A&P lab manuals, here.
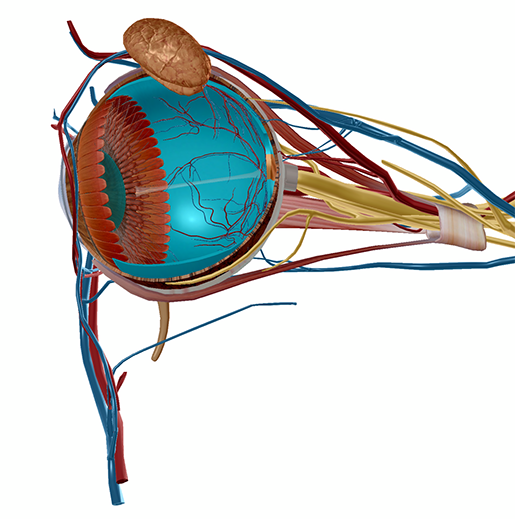
 The choroid, retina, and pupil. Image from Visible Body Suite.
For this activity, the students can work individually, in pairs, or in small groups. Each person or group will need:
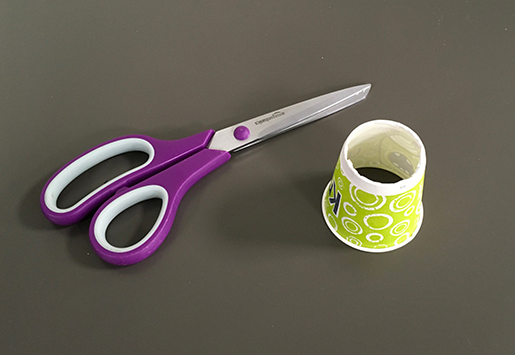
- 3 small paper cups
- Wax paper
- Pin for poking holes in cups*
- Scissors
- Black marker or black construction paper
- Tape (optional, but definitely helpful for holding the wax paper steady)
*I used a pen to make larger holes from the outset, so you could see them in the pictures.
Here are the instructions for constructing the model eyes:
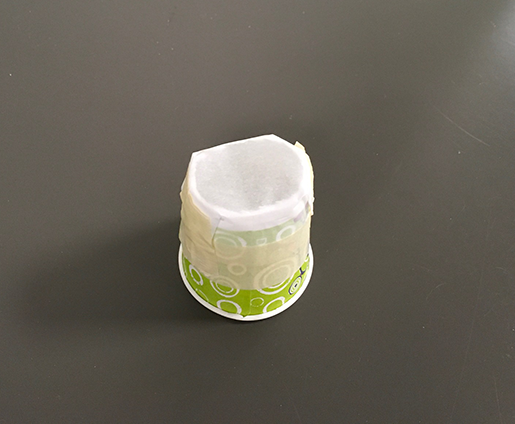
- Cut the bottom out of one of the paper cups and attach the wax paper to it to create a new bottom. Keep the wax paper as smooth as possible. The wax paper will simulate the retina.
-
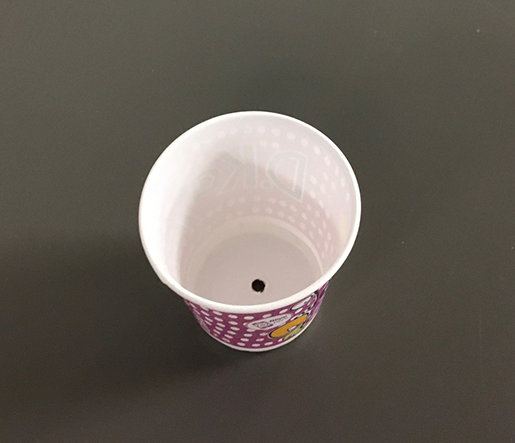
Take your second cup and use a pin to poke a small hole in the center of the bottom of the cup. This hole is the pupil.
-
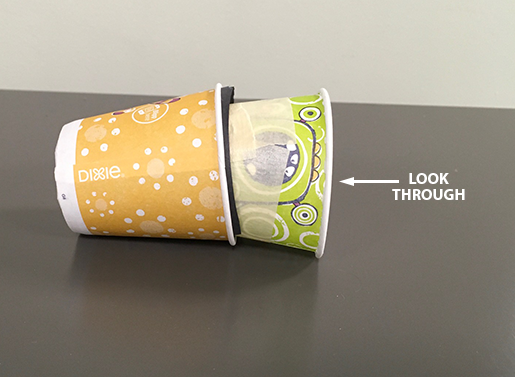
Place the wax paper cup inside the cup with the small hole in the bottom.
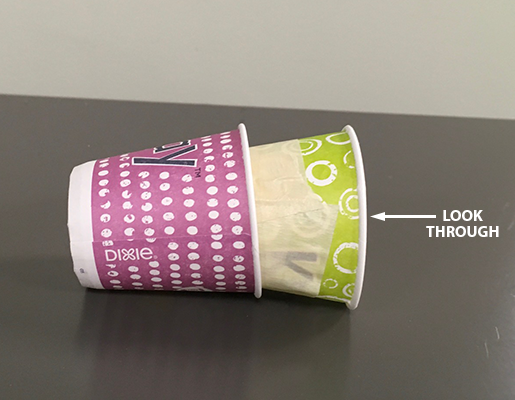
-
Go to a bright window and adjust the spacing between the two cups. You should be able to see an image on the wax paper, but it will not be quite clear.
-
Take your third paper cup and use a black marker to color the inside, or line it with black construction paper. This dark lining simulates the choroid. Poke a small hole in the bottom of this cup (going through the black construction paper as well as the cup, if you’re using construction paper). Look out the same window as before with this cup on the outside of your wax paper cup.
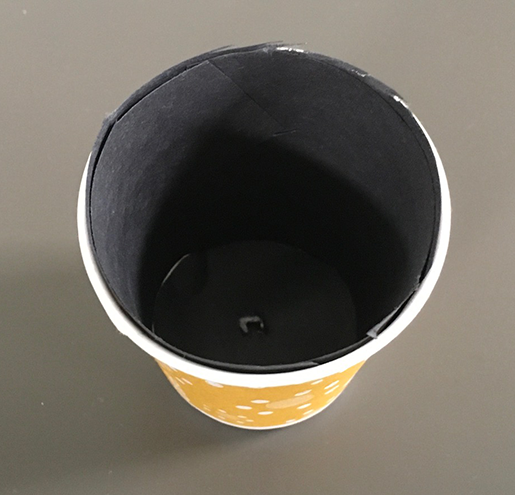
Students should answer the following questions to check their understanding of the choroid’s function.
- How does the black cup affect image clarity?
- What does the choroid do to help your eye to see more clearly?
Next, students should enlarge the hole in the bottom cup to simulate the dilation of the pupil, and they should record their observations of doing so on the clarity and brightness of the image.
They should also answer the following discussion question:
- What is the purpose of the pupil dilating in low light conditions and constricting in high light conditions?
Activity 3: Create a Model Lens
Now that students have observed how light passes through the pupil and hits the retina, they will create a model lens to check out how the lens focuses an image onto the retina. This activity also comes from our A&P eye lab manual.
 The retina and lens. Image from Visible Body Suite.
Once again, students can work individually, in pairs, or in small groups. Each person or group will need:
- Quart-size zip-top bag
- Water
- Measuring cups
- Newspaper or other paper with small print on it
Here are the lens-construction instructions:
- Pour a cup of water into a quart-size zip-top bag.
- Squeeze the excess air out of the bag.
- Place the bag above a piece of paper that has small print on it (such as a newspaper).
-
Flatten the bag and examine the writing.
-
Squeeze the bag, so the water takes on a ball shape. Hold the bag near the writing.
Students will notice that the print seems larger than before. You can then explain that after the cornea refracts (bends) light, focusing it into the pupil, the light that goes through the pupil is refracted by the lens to focus an image on the retina.
Students should follow up on this explanation by watching the video in Module 23.16 of the A&P app. This video will demonstrate the difference between what goes wrong in cases of nearsightedness and farsightedness.
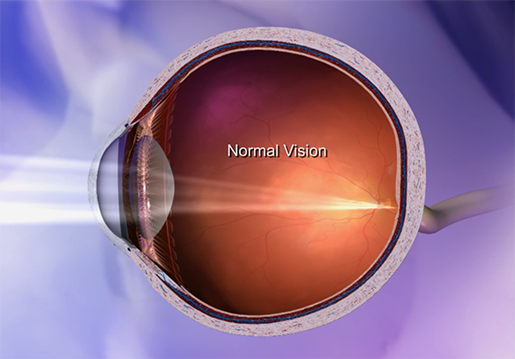
Light entering the eye, being focused through the pupil, then being used by the lens to focus an image on the retina. Image from A&P.
Activity 4: Sort Eye Structures by Function
After learning about the lens, students will complete another AR lab activity worksheet! Click here to download a copy. (It’s the second two pages of this set.)
Students will once again open up the eye microanatomy view in VB Suite and select structures to learn about them.
For this activity, students will explore the following structures:
- Choroid
- Ciliary body
- Cornea
- Eyelid
- Inferior oblique
- Inferior rectus
- Iris
- Lacrimal gland
- Lacrimal sac
- Lateral rectus
- Lens
- Medial rectus
- Optic nerve
- Retina
- Sclera
- Superior rectus
They will then categorize these structures according to their functions (protection & nutrition, movement, accommodating light, and nerve impulse transmission), following the table on the worksheet.
Use Visible Body Suite to teach eye anatomy!
Activity 5: Take a Practice Quiz!
Practice quiz 23.b (Eye Dissection) in the A&P app will give your students the chance to check the knowledge they’ve obtained through the previous activities. Students can access the practice quiz by selecting Practice Quizzes > 17–23 Nervous System and Special Senses > 23.b Eye Dissection.
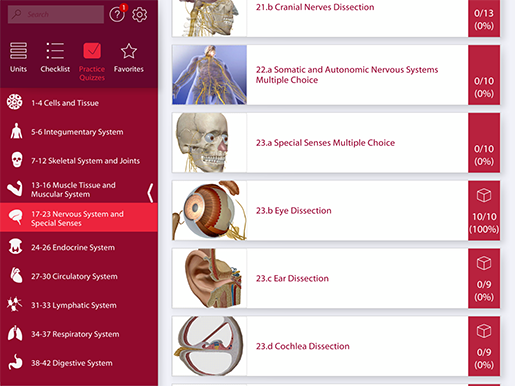
Practice Quizzes in A&P.
This quiz is 10 questions long and covers the basic anatomical structures of the eye. Students will be prompted with the name of a structure, and they will have to select that structure on an accompanying 3D model. (Pro Tip: They might have to hide some structures to get to others.)
After selecting and submitting their answer, the student will receive feedback as to whether their answer was correct or not. If their answer was incorrect, they can use the “Show Answer” function to highlight the correct structure.
And there you have it—five activities to introduce your students to the anatomy and physiology of the eye. Happy teaching!
Are you an instructor? We have award-winning 3D products and resources for your anatomy and physiology course! Learn more here.

