Forensic Science Lesson Plan Part II: Autopsies with Visible Body
This is the second part of a two-part lesson designed for a high school forensic science class. The first part can be found here!
In this lesson, we'll use a fictional case study and the resources in Visible Body Courseware to learn about autopsies. Students will be able to apply what they’ve already learned about directional terms to this new context!
In this lesson, you’ll find:
- The continuation of a fictional crime narrative
- A premade Tour that uses 3D models to illustrate concepts
- A short assignment for students to review and reflect on what they’ve learned
Students will learn about the autopsy process and different techniques used to perform an autopsy. By the end of this lesson, students will understand:
- When an autopsy is ordered
- What information an autopsy can provide
- The differences between the Virchow, en masse, en bloc, and Rokitansky techniques
- Whodunit!
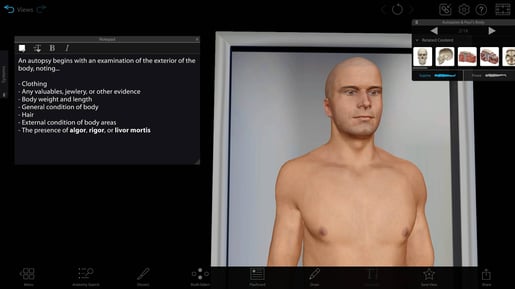
Image of Tour. You can assign Tours in Visible Body Courseware!
How to use this lesson plan
Like the previous lesson, this lesson uses a Tour and a quiz assignment in Visible Body Courseware. All relevant content is already loaded into Courseware and ready to go!
If you don’t have access to Courseware yet, reach out to our team for a free instructor trial!
If you already have Courseware, follow these steps to add this folder to your course in Courseware:
- Click on this link to add the lesson plan material to your Courseware account.
- In this new course, click on the Bulk Editing tool, select the relevant folder(s) and click Copy. Choose the destination course and folder and copy.
- Navigate to your existing course, where you will find the content you copied. Use the bulk editing tool to edit release and due dates and publish. If you have Canvas deep integration set up, deploy to Canvas
Once this lesson content is copied to your account, you can customize it to fit your class’s unique needs!
Here are links to the text of part II and part III of the case study. These PDFs and the full text can also be found in the folder in Courseware.
1. Return to the case study
Review the questions and notes your students generated in the class before. Then, move on to the second part of the case study.
In this section, investigators interview the people closest to Paul and Brenda, and then Paul’s body is found and an autopsy ordered. This should take approximately two minutes to read aloud.
Next, pause for discussion. Ask your class what they already know about autopsies.
2. Learn about autopsies with a Tour
Before we examine Paul’s body, let’s first learn about autopsies. This Tour is split into two parts: autopsy information and an examination of the body.
Views 1-12 are lecture aids that will guide a lecture on autopsies. These views walk through autopsy basics including when autopsies are ordered, what information is noted about the body, how incisions are made, and brief descriptions of four major autopsy techniques. The Tour also mentions algor, rigor, and livor mortis—if you haven’t yet covered these terms in class, further explanation of these terms may be needed.
It varies state-to-state (and sometimes county to county!) who can actually perform an autopsy. For this part of the lesson, it may be helpful to look up your state or county’s case and lead a discussion about that.
The views in this Tour are more than static images—they’re interactive 3D! As you lecture, manipulate the models and point to different structures, tagging them and adding annotations. View #5 in the Tour is designed so that you can use the Dissect tool to dissect away the muscles, ribs, sternum, and peritoneum, simulating what happens during an actual autopsy.
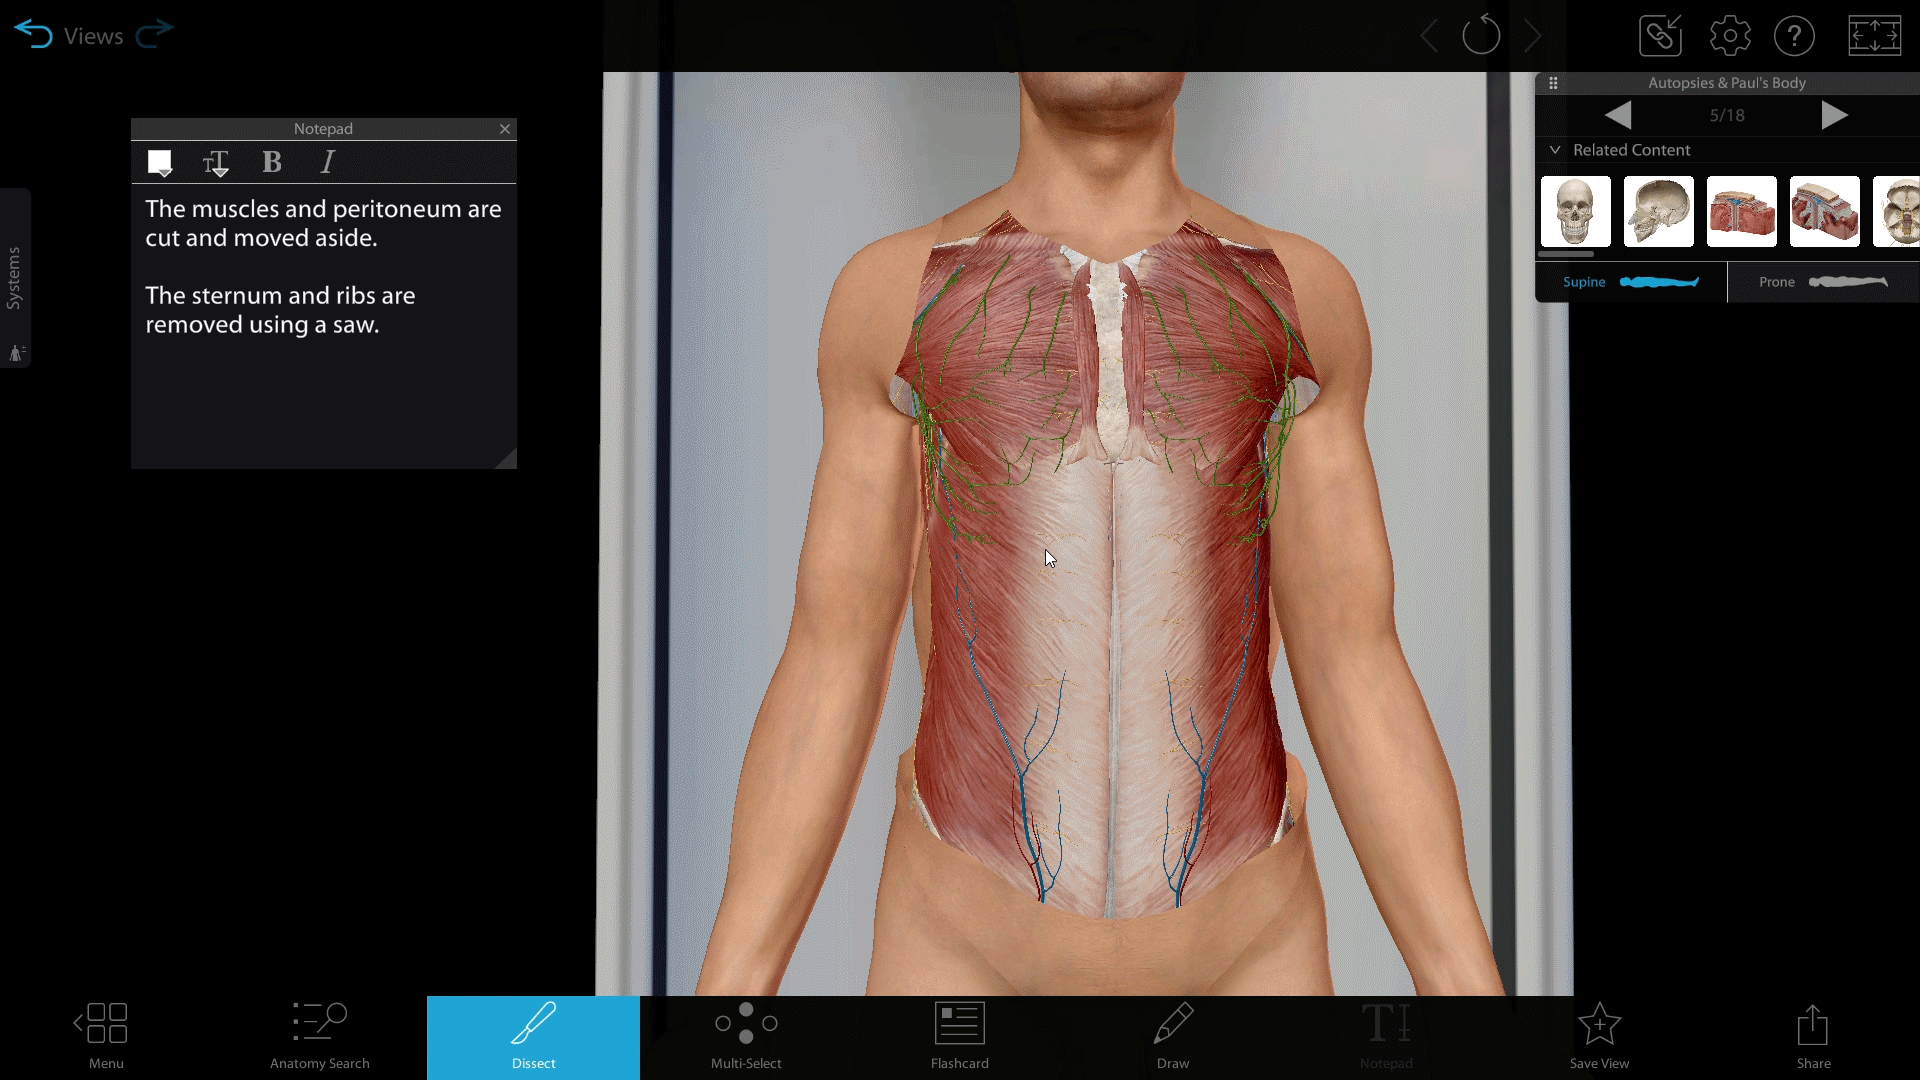
GIF of the dissect tool used in a Tour. You can assign Tours in Visible Body Courseware!
Views 13-18 illustrate the highlights of Paul Ossis’s autopsy. Ask students to use directional terms to describe the injuries they see!
3. Recap the case and learn whodunit
With Paul Ossis’s autopsy complete, your class has learned some useful information about the crime. Ask the class to review the evidence they have collected so far.
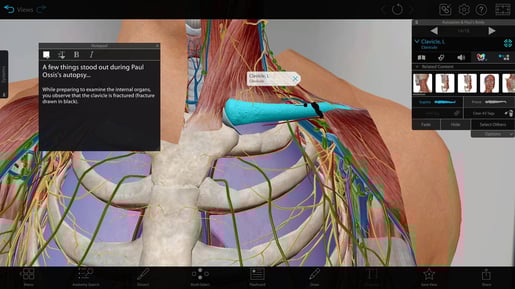
Image of Tour. You can assign Tours in Visible Body Courseware!
Next, it’s time for the big reveal, where information from the autopsy helps point to further clues. The "Whodunit?" portion of the case study will take about three and a half minutes to read aloud.
4. Review and reflect with an assignment
Students can then complete an assignment in Courseware to test what they’ve learned. In this quiz, five short answer questions ask students to reflect and think critically about autopsies.
- Describe the en masse, en bloc, Virchow, and Rokitansky techniques.
- In 2-3 sentences, answer the following question: Why are organs measured and weighed during an autopsy?
- In 2-3 sentences, answer the following question: What can autopsies tell us?
- It’s important that the body is thoroughly and accurately described during an autopsy. Why?
- In 1-2 sentences, describe the circumstances under which autopsies are ordered.
What’s next?
This concludes this case study lesson plan, but there is so much content in Visible Body Suite and Visible Body Courseware just waiting to be explored! Here are some blog posts to inspire your teaching:
- 6 Ways to Use Visible Body in a High School Forensic Science Class
- 10 Creative Uses for Flashcards in Visible Body Suite
- 3 Ways to Use QR Codes in the Classroom with Visible Body Suite
- Free Lesson Plan: Types of Bones
Sources
Below are the sources used to develop this lesson plan! But first, a quick note: there can be confusion on the differences between autopsy techniques. The information used in this Tour is from the College of American Pathologists' An Introduction to Autopsy Technique.
Sources on autopsies:
- Indiana autopsy protocol
- Forensic Autopsy
- An Introduction to Autopsy Technique
- Post Mortem Technique Handbook (second edition)
- How Autopsies Work
- Performing an Autopsy
- Forensic Pathology and the Journey Through an Autopsy
- Postmortem Examination
Sources used for Paul’s injuries:
- Fatal Motor Vehicle-Pedestrian Collision Injury Patterns—A Systematic Literature Review
- Forensic Investigation - Motor Vehicle Accidents and Motor Vehicle-Pedestrian Accidents
- Investigating Vehicle vs. Pedestrian Collisions
- Pedestrian Injuries and Fatalities
- What Are the Stages of Rigor Mortis? 6 Stages
- Methods of Estimation of Time Since Death
- Clavicle Fractures
- Clinical Profile and Autopsy Findings in Fatal Head Injuries
- Forensic Evaluation of Subarachnoid Hemorrhage
Be sure to subscribe to the Visible Body Blog for more anatomy awesomeness!
Are you an instructor? We have award-winning 3D products and resources for your anatomy and physiology course! Learn more here.

