How to Use Visible Body's Flashcards in Atlas 2022+ on Web and Mobile
Flashcards are available on mobile and web for Web Suite, Courseware, and Human Anatomy Atlas 2022+users!
Now you can become a studying powerhouse and create your own Flashcards and Flashcard Decks using 3D views right in Atlas—no screenshots or additional software required. You can share your Flashcards and Decks, too, so it’s easy to build a custom study guide for a course you’re teaching or collaborate with your classmates to prepare for an exam.
In this blog post, we’ll walk you through the basics of how to make Flashcards and Flashcard Decks, how to share them with other Visible Body users, and how to build your Flashcard Deck collection using our premade Deck library.
How to get premade Flashcard Decks
If you're short on time and want to get started quickly with studying or creating assignments for your students (which is super easy to do in Courseware!), we have a library of premade Flashcard Decks you can download and save to your Visible Body account in seconds.
From Visible Body's premade Flashcard Decks page, search for the topic you want using the search bar or filters, then click or tap the "Open with..." button for the Deck you want. If you're on a desktop or laptop, you can open the Deck in Web Suite or Courseware or just copy the link and paste it in as shown above. If you're on a mobile device, you can tap the "Mobile" option to open the Deck in the app right away. Mobile users also have the option to copy and paste the link.
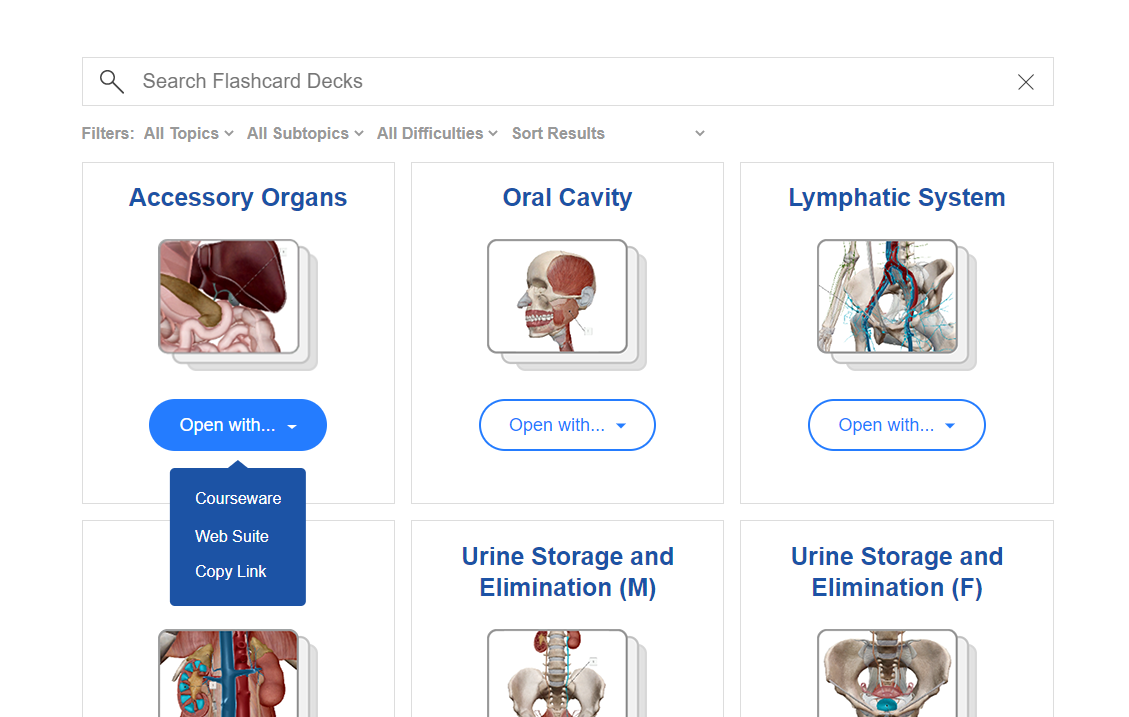 Options for opening a Deck from the premade Flashcard Decks page for desktop.
How to access Atlas 2022+ for web and mobile
First, let's go over how to access Atlas 2022+. If you're using Web Suite or Courseware, go to the My Apps page and click the Launch button next to the Atlas icon to launch the web version. Alternatively, you can download the mobile version of Atlas 2022+ by clicking the "Get Mobile App" button.
 Launch Atlas 2022+ for web or mobile from the My Apps page in Web Suite and Courseware.
Remember: if you bought Atlas 2022+ through the iOS App Store or Google Play Store, you have access to Web Suite, too! Just use the same Visible Body User Account credentials from your mobile app to log in to Web Suite and you'll be able to get to the web version of Atlas, as well as the other products that are part of Web Suite (including Visible Biology, which also offers the Flashcard feature!).
How to access Flashcards in Human Anatomy Atlas
Next, we'll show you how to get to Flashcards inside Atlas.
Select the Study tab in Atlas 2022+(either in your browser or on your mobile device) to access Flashcards, Flashcard Decks, Quizzes, and Lab Activities.
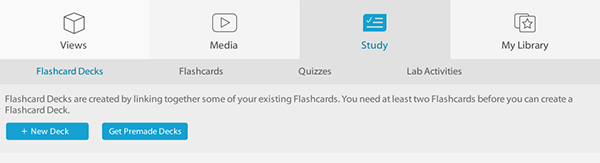
The new Study section tab and subsections in Human Anatomy Atlas for Web Suite and Courseware.
You’ll see a few sample Flashcards and Flashcard Decks if you select those tabs, but in order to build your collection, you’ll want to make your own custom Flashcards and Decks or download some of Visible Body’s premade ones.
How to make Flashcards
So, how do you make a Flashcard? Start off by opening up any 3D View in Human Anatomy Atlas—yes, this includes bony landmark, muscle attachment, microanatomy, and muscle action Views! Pro tip: you can highlight structures on your view before you turn it into a Flashcard! This is great if you want to label a bunch of structures on the same card, or just for creating good visual contrast!
Once you’ve got your view on the screen, select the “Flashcard” button at the bottom of the screen.
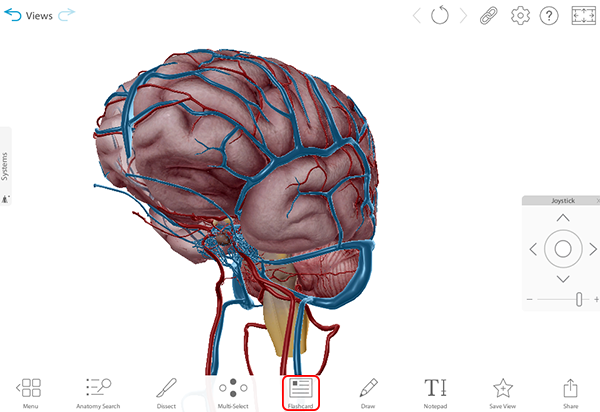
To create a Flashcard from a 3D View in Human Anatomy Atlas for Web Suite and Courseware, select the Flashcard button.
You’ll then need to figure out where you want the model to fit on the card and choose whether you want to work on the front or the back of the Flashcard first (the front is where you’ll pose a question and the back is where the answers will be). Position the model in the black box and select which side of the card you want to annotate.
This will bring you to annotate mode. Here, you can zoom in and out on the model, but you’ll no longer be able to move it. If you want to reposition the model on your card, hit Back.
Here’s what you can do in annotate mode:
- Add a label. If you’re working on the back of a Flashcard, you can type in a structure name or use the Auto Label feature and have Atlas fill in the structure name for you.
- Draw in 2D. Prettify your Flashcard with pen, pencil, and highlighter tools, as well as arrows and shapes. You can adjust the thickness and opacity of lines and shapes and use the erase tool to remove them.
- Add a text box. You can change the color, size, and alignment of the text within the text box, as well as the position and size of the text box itself.
When you’re ready, you can flip to the other side of the Flashcard and write whatever answer or annotation you’d like there.
To save your Flashcard, select the Save Flashcard button. When saving, you’ll be prompted to rate the difficulty of your Flashcard (easy, medium, hard), name your Flashcard, add your card to an existing Deck (optional), and add keywords to help you find the card and/or add it to a Flashcard Deck later.
How to create a Flashcard Deck
Once you have a few Flashcards, you’ll probably want to put them together into a Flashcard Deck so you can flip through and use them to study! Here’s how to make a deck using existing Flashcards.
First, head to Study > Flashcard Decks. Then, hit the +New Deck button. You will be prompted in a pop-up menu to search for cards—this is where you can use your keywords!
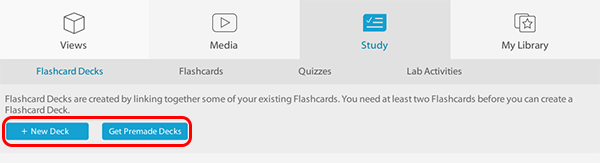
Start here if you want to make a new Flashcard Deck or download a premade deck in Human Anatomy Atlas for Web Suite and Courseware.
Click cards to select them and add them to your deck, then select Next on the pop-up menu. Drag the card icons to reorder the cards, then save your deck. You’ll need to name it, and you’ll also have the option to add keywords so you can search for it later.
Premade decks on the website are also an option! You can find them here or by selecting the “Get Premade Decks” button in Study > Flashcard Decks. Search our collection of premade decks by keyword, or sort them by subtopic or difficulty. Click the download button for Courseware or Web Suite to open a deck, then save it to your account.
How to edit Flashcards and Flashcard Decks
It’s easy to make changes to Flashcards and Flashcard Decks.
To edit an individual Flashcard, open that card and click the three dots button in the upper right corner of the screen to access the options menu. (You can also access the options menu by selecting the three dots button below the card’s thumbnail in Study > Flashcards.)
Here are the different things you can edit using the options menu for a Flashcard:
- Edit your card’s content
- Rename your card
- Add the card to an existing deck
- Create a new deck from the card
- Duplicate the card
- Edit the card’s keywords
- Change the card’s difficulty rating
- Share the card
- Delete the card
If you make a change to a specific card, that change will show up in whatever deck(s) it’s in, too.
To edit a deck, go to Study > Flashcard Decks and select the three dots button below the thumbnail of the deck you want to edit. This will bring up an options menu, from which you can:
- Change which cards are in the deck
- Edit the “default” order in which cards will appear in the deck
- Edit the deck’s keywords
- Share the deck
- Delete the deck
How to use your Flashcards to study
Now that you’re familiar with the basics of making and editing Flashcards and Flashcard Decks, here’s how you can use them to study!
First, open a deck from Study > Flashcard Decks. Upon launch, you’ll get a few options before the cards display. You can choose what order the cards will be presented in: by default order (the order you put the cards in when making the deck) or by difficulty. You can also set a time limit for cards to display (between 10 and 60 seconds), or choose “untimed.” If you’ve already gone through a deck, you’ll also have the option to go over only the cards you missed last time.
Once you’ve begun your study session, answer the question or identify the structures on the front of each card, and flip it to check your answer. (To flip the card, all you need to do is click on it.) Then, use the thumbs-up and thumbs-down buttons at the bottom of the screen to indicate whether you got the answer correct or not. Each card will also give you the option of skipping it with a button in the lower right corner of the screen. The skip button icon also serves as the time meter for each card if you set a time limit.
When you’re done going through all the cards in the deck, a pop-up will let you know how you did (how many cards you got correct, incorrect, or left unanswered). From there, you can choose to go back to the menu or take one of the following next steps: review the whole deck again, review only the cards you missed, or edit the deck.
How to use the Explore Mode feature to make the most of your Flashcards
Want to know the best thing about Visible Body’s Flashcards? They’re not just for memorizing structures! Using Explore Mode, you can turn the View from a Flashcard into a full 3D View where you can do all the learning you’d normally do in Atlas (checking out related structures and content, clicking on structures for more information, highlighting, rotating, dissecting, and more). When you’re done, you can jump right back to the Flashcard with the click of a button.
Watch the video below to learn more about Explore Mode and how to use it to take your studying beyond memorization to true understanding:
How to share your Flashcards
Whether you’re an instructor using Flashcards to create a study guide or a student looking to brush up on the basics before an exam, you can share both individual Flashcards and Flashcard Decks with your students or classmates!
Sharing Flashcards or Flashcard Decks works a lot like sharing Views or Tours. When you’re viewing an individual card, generate a share link with the three dots button.
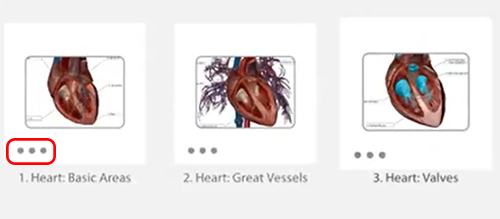
The three dots button for Flashcards and Decks in Web Suite and Courseware.
To share a deck (or to share a card from Study > Flashcards), use the three dots button under the thumbnail of the deck or card you want to share.
To open a share link for a flashcard or deck, copy it into your browser or into the Share Link window in the app.
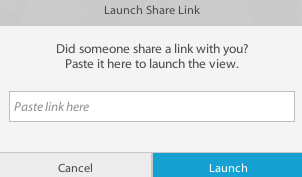
This window will let you launch a Share Link in Human Anatomy Atlas in Web Suite and Courseware.
Once you’ve opened the card or deck in Atlas on your device, you’ll need to save it to your account to make it part of your collection. To do this, select the Save icon at the bottom right corner of the screen.
We hope you enjoy this new feature of Atlas for Courseware and Web Suite and that Flashcards help make your A&P learning experience (or that of your students) more fun, engaging, and effective!
Be sure to subscribe to the Visible Body Blog for more anatomy awesomeness!
Are you an instructor? We have award-winning 3D products and resources for your anatomy and physiology course! Learn more here.

