How to Teach Rotator Cuff Injuries with VB Suite
Over two million Americans encounter rotator cuff problems every year—future allied health professionals need to understand the anatomy and mechanics behind rotator cuff injuries so they can address this common problem.
Visible Body Suite is here to help! With a comprehensive library of 3D models, animations, and more, VB Suite will help your students visualize the anatomy of the rotator cuff and beyond.
This blog post is aimed toward teaching in a classroom, but many of these ideas can easily be adapted to teach patients and their families about rotator cuff injuries. VB Suite is used in over 1,000 schools all over the globe, and it’s also an extremely popular option for practitioners, who use the app for reference and patient communication!
Learn rotator cuff anatomy
Students first need to know that the rotator cuff is a group of four muscles: the subscapularis, infraspinatus, teres minor, and supraspinatus.
First, show students the rotator cuff muscles in the context of the shoulder region. From VB Suite’s main menu, click on Muscles & Kinesiology and scroll to find the shoulder region model.
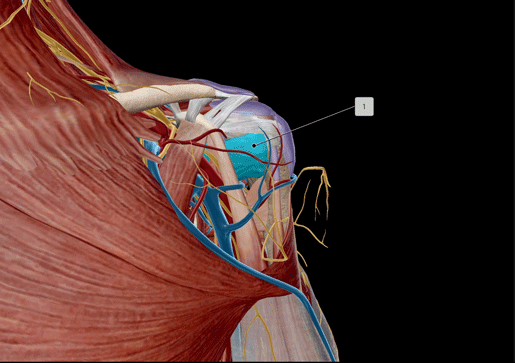
Use the Dissect tool to remove all three heads of the deltoid. Next, select each muscle in the rotator cuff one by one. Once you’ve selected the muscle, click on the pin icon in the info box to show your students its insertion and attachment points. When you’re ready to move to the next muscle, click on the back view arrow in the upper left corner to return to the shoulder region view.
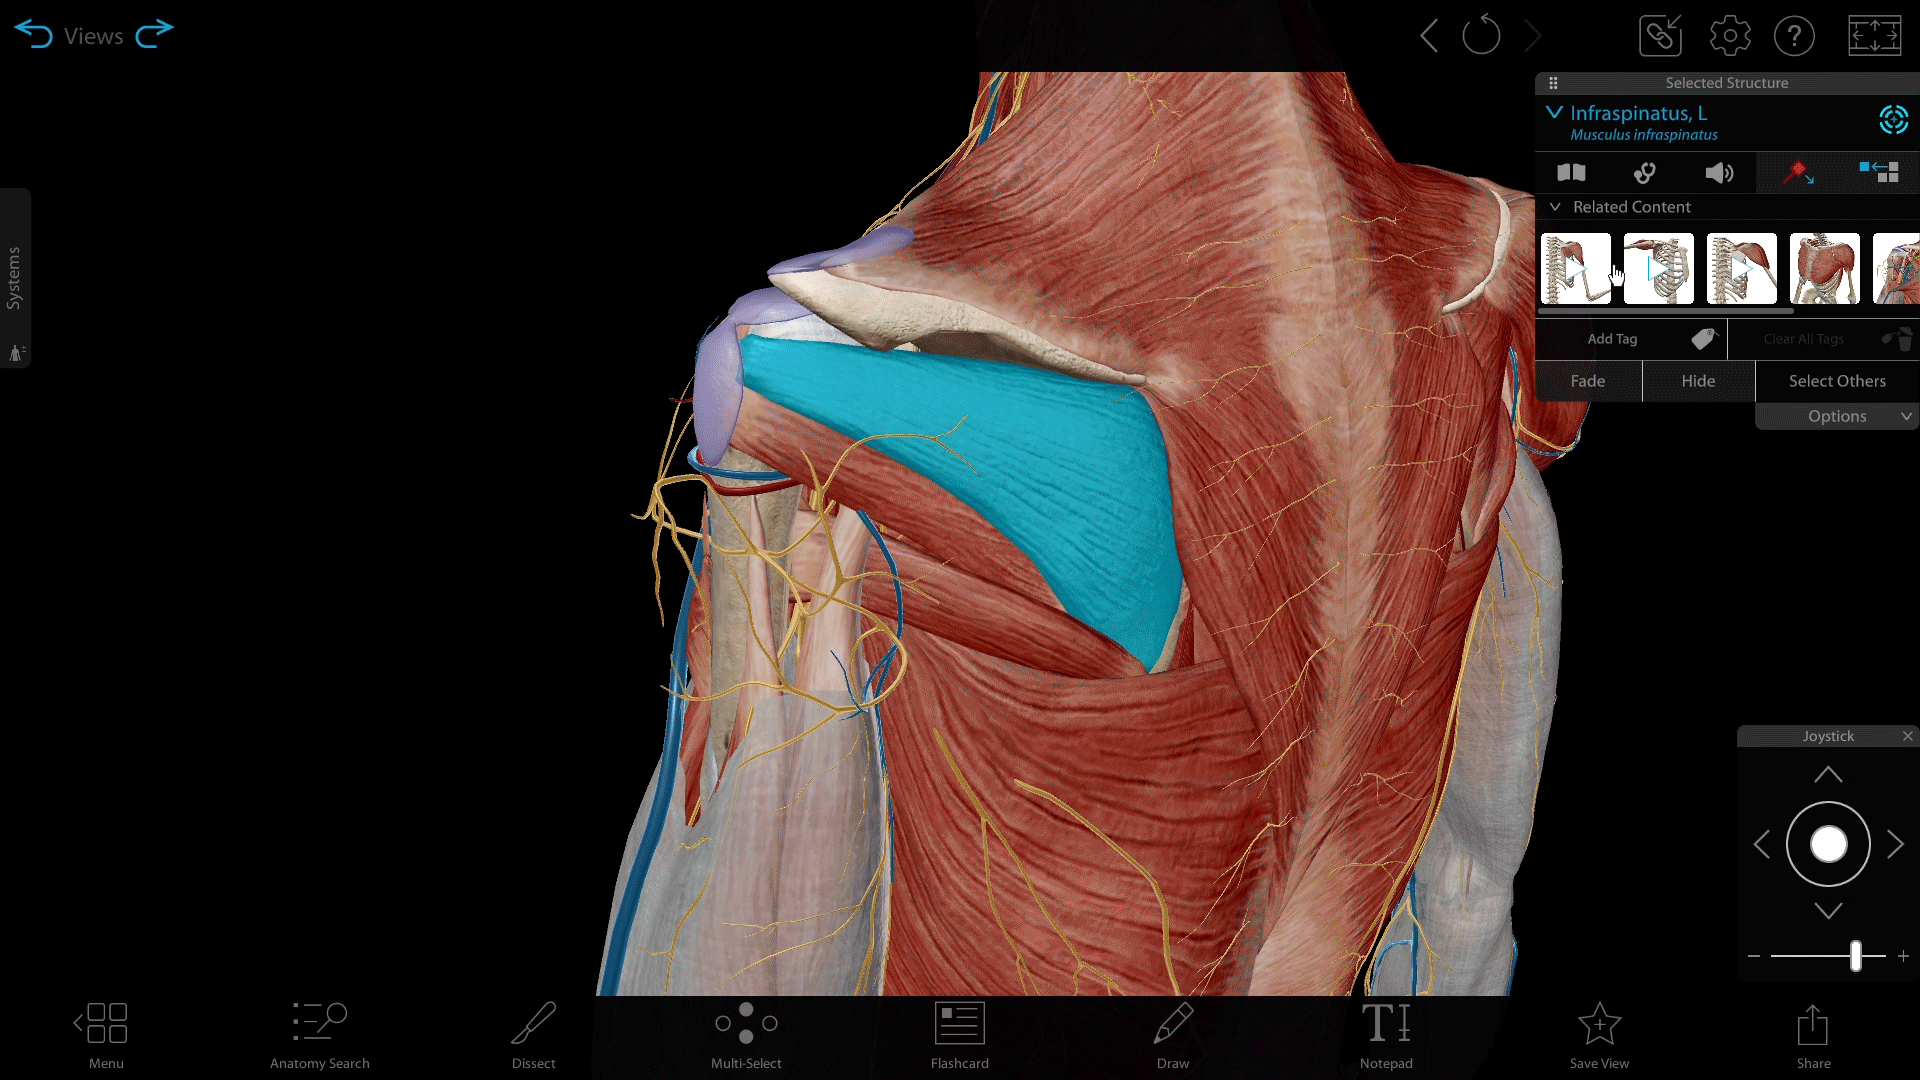
Viewing muscle insertion and attachment in VB Suite.
As you talk your way through the rotator cuff muscles, add Tags and Draw tool annotations to highlight your points!
Once students have an overview of these muscles, it’s time for a quick review with Flashcards. You can make your own Flashcards with a couple clicks, or you can download the Upper Limb Muscles Deck from our free library of premade content.
Flashcard in VB Suite.
You can also have your students make their own Flashcards, which is a great way to get them learning actively.
Watch the rotator cuff in motion
Now that we’ve looked at an intact rotator cuff, let’s talk about how it can tear. Use the search function to find VB Suite’s bite-sized animation that walks through rotator cuff tears.
Next, explore the rotator cuff tear pathology model—make sure to ask your students which muscle is torn in the model. Discuss the difference between a partial and full thickness tear and ask students to identify which is represented in the model.
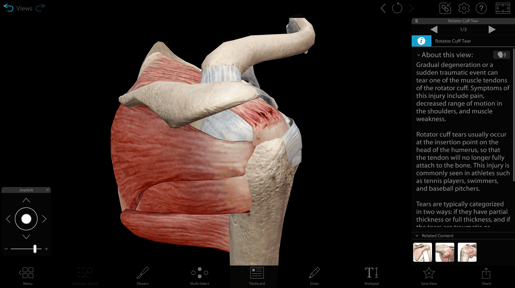
Screenshot of fully interactive rotator cuff tear model in VB Suite.
Show students how the rotator cuff muscles are used by examining the shoulder abduction muscle action.
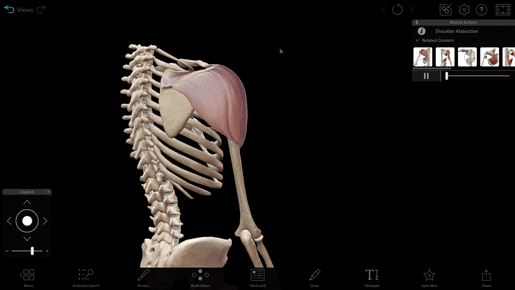
GIF of shoulder abduction model in VB Suite.
Most rotator cuff injuries are due to repetitive action—ask students to brainstorm ideas on what kinds of professions or activities would involve repetitive actions that could result in degenerative rotator cuff injuries.
Compare and contrast: tear and tendonitis
Rotator cuff pain does not necessarily mean a partial or full thickness tear—tendonitis can cause similar pain. Rotator cuff tendonitis refers to the inflammation of the rotator cuff muscles caused by microtears.
Have your students compare the rotator cuff tendonitis and tear models and make a list of their observations. Then, explain how rotator cuff tendonitis can lead to a tear.
To explore more pathologies that cause pain in the shoulder, check out the labral tear and damaged articular capsule models!
Practice rotator cuff stretches
Physical therapy is a common treatment for rotator cuff injuries because it can strengthen the rotator cuff muscles and improve movement.
Ask your students to practice some basic rotator cuff exercises like doorway stretches and side-lying external rotations, paying close attention to how those exercises affect the muscles of the rotator cuff. This is particularly helpful for students who like to learn kinesthetically!
Want to take this activity to the next level? Add muscle actions in augmented reality! For example, you can pair the shoulder lateral rotation animation with side-lying external rotations.
Break the class up into pairs. One student can perform the exercise while the other student views the muscle action animation in AR on their mobile device, observing the muscles at work. Then, have students trade places.
More teaching ideas
When it comes to teaching with VB Suite, rotator cuff injuries are just the tip of the iceberg! Check out these other great blog posts:
- How to Teach Muscle Naming with Immersive Assignments
- A Heart Rate Lesson Plan with Visible Body Suite
- Free Lesson Plan: Anatomical Planes, Positions, and Directional Terms
- Why Visible Body Is a Great Match for Career and Technical Education Programs
Be sure to subscribe to the Visible Body Blog for more anatomy awesomeness!
Are you an instructor? We have award-winning 3D products and resources for your anatomy and physiology course! Learn more here.

