

Staining the Small Stuff: Why Histology is Awesome
If you follow VB, you might have noticed we’ve been talking a lot lately about the new histology content in our Anatomy & Physiology app. Well, what’s so great about histology?
I’m glad you asked. Histology is the study of tissues — that is, groups of cells working together to do the same thing. Our body has four basic types of tissue: nervous, muscle, epithelial, and connective. Med students learn about histology to understand these types of tissue when they are healthy and what can happen to them when they’re affected by various diseases. This means that histology sits at the crossroads of anatomy, physiology, and pathology. Yeah, it’s pretty cool stuff.
All histology content in this video is from Anatomy & Physiology. Teaching A&P? Ask for a free instructor demo of Visible Body Courseware!
To help you understand a little more about the study of histology, we’re going to focus in on two of its most important elements: microscopes and staining techniques.
A Microscopic History
Microscopes as we know them were invented around the beginning of the 17th century. Though eyeglasses and magnifying lenses certainly existed at that time, and early optics enthusiasts such as the 11th-century scholar Ibn al-Haytham had written treatises on light and vision, it was the microscope that dialed the study of biology up to 11.
So who can we credit with this groundbreaking innovation? Quite a few people, actually.
Hans & Zacharias Janssen, a father-son team making eyeglasses in the 1590s, created a device consisting of two lenses and a tube that could magnify an object up to nine times. That may not seem like a lot to us today, but it got the ball rolling.
In 1609, Galileo made modifications to the Janssen microscope which essentially resulted in a compound microscope with a concave eyepiece lens and a convex objective lens. Galileo called it the occhiolino (“little eye”).
Robert Hooke’s 1665 book Micrographia saw the first use of the word “cell” (based on his analysis of cork) and contained stunning images of various materials as they appeared under a compound microscope. Micrographia was a huge hit — people were fascinated by this new way of looking at the natural world. You can see the manuscript for yourself here.
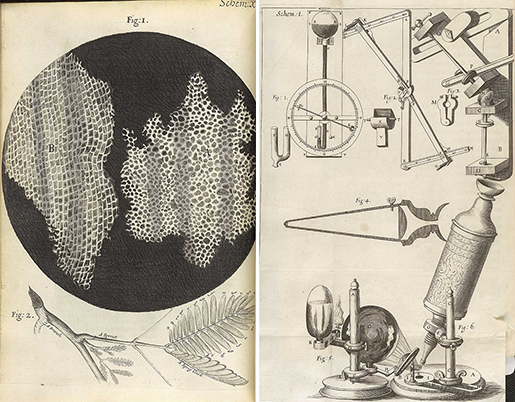
Did you know that Hooke used the word "cell" because the divisions in the cork reminded him of the small rooms where monks lived? Image source.
Antonie van Leeuwenhoek (1632- 1723) created a (single-lens) microscope of his own that had up to 270x magnification. Even though he was a draper for a living, he liked making lenses for fun (hey, they didn’t have Netflix back then). His curiosity about the world around him led him to identify protozoa, bacteria, spermatozoa, and muscle fibers. He even used saffron as one of the first staining agents. Jan Swammerdam (1637-1680) observed red blood cells with single-lens microscopes. Suffice it to say, Enlightenment Europe had microscope fever.
Designs for optical (light) microscopes continued to improve through the 18th, 19th, and early 20th centuries. There was just one problem: anything smaller than the wavelength of visible light couldn’t be viewed with this type of microscope. In 1933, Ernst Ruska and Max Knoll built the first electron microscope, which used a magnetic field and an electrical current to magnify extremely small objects.
Today, we can see even ittier and bittier objects than ever before — even individual atoms. For the purposes of histology, though, modern optical microscopes are the main tool of the trade.
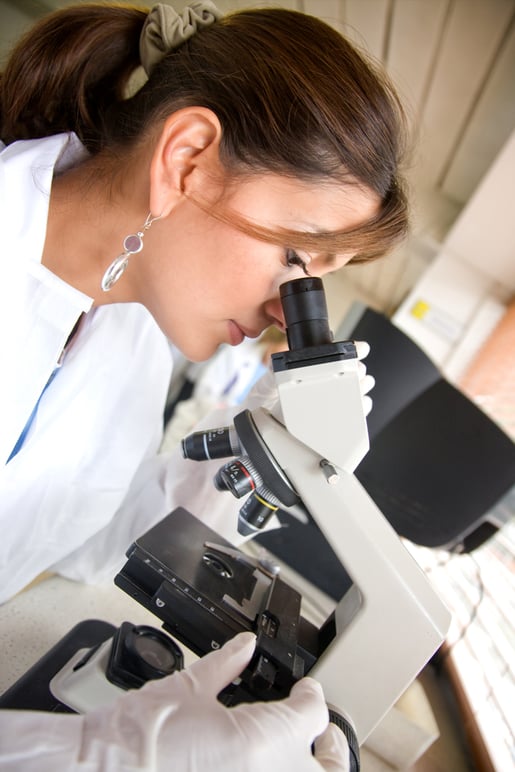
Microscopes used in labs and classrooms typically have an LED or halogen light below the stage where the specimen sits, as well as a condenser under the stage to focus the light on the specimen. They also have multiple objective lenses which can be easily switched for different magnifications. Some microscopes are equipped with cameras so scientists can view their specimens on a computer screen.
From Sample to Slide
Just as important as the microscope itself is the preparation of the specimen to be viewed. Tissue samples go through an extensive process before they are analyzed by pathologists in the lab.
- Fixation.
First, the tissue needs to be fixed. This usually involves immersing the sample in a fixative such as 10% formalin (a formaldehyde solution). The fixed tissue is then dehydrated and infused with and embedded in (paraffin) wax.
If pathologists want to look at the tissue’s morphology in more detail, resins (epoxy or acrylic) can be used instead of paraffin. A glutaraldehyde solution is typically used as the fixative before resin embedding.
An alternative to fixation is freezing a fresh tissue sample before slicing it into sections. This allows for rapid diagnosis because it bypasses the fixation process, but that comes at the expense of section quality.
For the sake of keeping things brief, I’m going to focus on paraffin embedding for the rest of this section. -
Sectioning
Once the wax solidifies, the specimen is sliced into sections 3-10 microns (micrometers) thick with a machine called a rotary microtome. Each section is placed in warm water to flatten out and then scooped up onto a glass slide. -
Staining
After removing the wax and rehydrating the section on each slide using decreasing grades of alcohol, it is time to stain the specimen to see its details. Since different materials will stain different parts of tissue samples, various solutions and staining methods are used depending on the tissue and what is being observed within the tissue. - Mounting
After staining, the slide is dehydrated and then mounted, meaning that a clear mountant substance and a glass cover sheet are placed over the specimen section to seal it.
Staining Methods
One of the most common stains used in histology, especially when analyzing whether biopsied tissue is cancerous, is the hematoxylin and eosin (H&E) stain. This staining technique was first used in 1876, so it’s been around for quite a while. Essentially, the H&E stain uses a combination of two dyes, hematoxylin and eosin. When H&E staining is used, the nuclei of cells are dyed blue by the hematoxylin. The eosin affects a range of other structures. Collagen shows up as pale pink, while muscle fibers are a darker pink. Acidophilic cytoplasm will be red and basophilic cytoplasm is purple. Red blood cells will show up, fittingly, bright red.
Video footage from A&P 6.
Want to know something awesome about staining? It helped us understand a lot about nervous tissue. In 1873, Camillo Golgi came up with a technique that used potassium dichromate and silver nitrate to turn some neurons a dark brown while leaving the rest of the tissue sample transparent. Golgi’s contemporary, Santiago Ramon y Cajal was able to use this technique to study the structure of individual neurons - axonal growth cones, dendritic spines, and all. He also demonstrated that the nervous system was made up of individual but interconnected neurons.
Cajal and Golgi were awarded the 1906 Nobel Prize in Physiology or Medicine for their neuroanatomical discoveries.
Histology is Awesome (QED)
Histology may focus on tiny structures, but it’s a big deal for medicine and biological science. The invention of the microscope gave scientists new ways of thinking about and studying living organisms, leading to significant advancements in healthcare and our understanding of the natural world. Different staining methods highlight different structures within tissues and their cells, providing contrasts that aid in analysis and diagnosis.
Today, looking at body tissues up close helps scientists not only learn about their structure and function but can also aid in determining the cause of death in an autopsy or diagnosing diseases such as cancer in living patients.
So next time someone asks you what histology is, you can say (1) it’s the study of body tissues, (2) it’s an important diagnostic tool, and (3) it’s amazing!
If you’re interested in adding histology to your A&P learning experience, check out A&P 6! We’ve got more than 100 slides to explore, complete with labels and descriptions, and you don’t have to strain your eyes looking into a microscope (yay)!
Be sure to subscribe to the Visible Body Blog for more anatomy awesomeness!
Are you a professor (or know someone who is)? We have awesome visuals and resources for your anatomy and physiology course! Learn more here.
Additional Sources:
